
VidNexus, start to finish
From a keyword to a finished video and its thumbnail: research, script, build, edit, render and Pikzels.
A 5-minute video version of this guide will play here. Everything it shows is written out below.
This guide follows one video on a food history channel, The Food Archive, through every step in VidNexus. Each step has its own tutorial for the details; this is the whole path in one place.
Before you start
VidNexus set up with an AI model, ElevenLabs and Pexels keys (see First-time setup).
A YouTube Data API key for Keywords, and a Pikzels API key with credits for thumbnails.
Step | Time in our test | Cost |
|---|---|---|
Keywords | Under a minute | Free (YouTube Data API quota) |
Research and outline | About 2 minutes | Free (your AI model) |
Script, hook score, fact-check | Under 3 minutes | Free (your AI model) |
Build (voice, footage, graphics, render) | About 6 minutes | $0.45 (ElevenLabs voiceover) |
Edits and a new render | A few minutes | Free |
Thumbnails | About 2 minutes | 3 Pikzels images (2 + 1 edit) |
1. Find a topic
Open Research > Keywords, type a seed keyword and click Research. We used spice trade history. VidNexus gathers YouTube's own suggestions, AI ideas and related names, then measures the top results for the best ones.
Top 10 views: how big the audience is.
Small channels: how many of the top results come from smaller channels, so there's room for a new one.
Overall: the two combined.
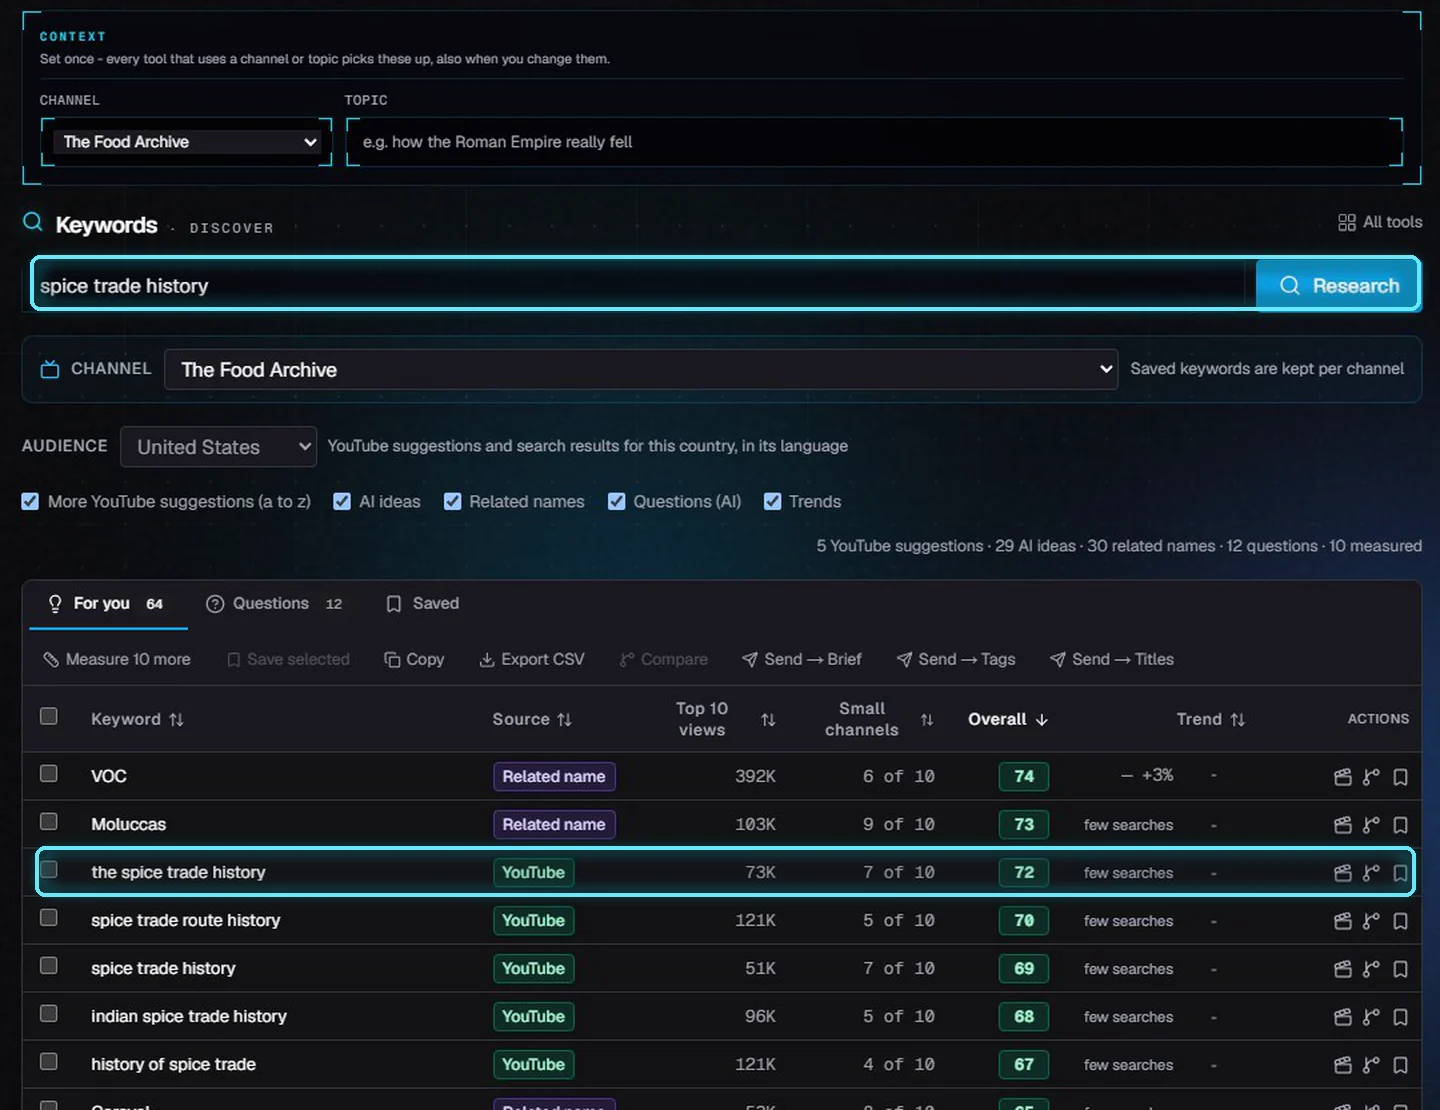
Scored keyword ideas. We picked the spice trade history, at 72.
Related names like VOC can score high but make a vague topic, so we took the best real search. Tick it, click Save selected, open Saved and click Start a video. Details: Find your next topic.
2. Write the script
On New video, the keyword is the topic. We kept Landscape, picked Standard (about 5 to 8 minutes) and the Documentary tone, then clicked Generate script. VidNexus researched the topic on the web and planned an outline in about two minutes.
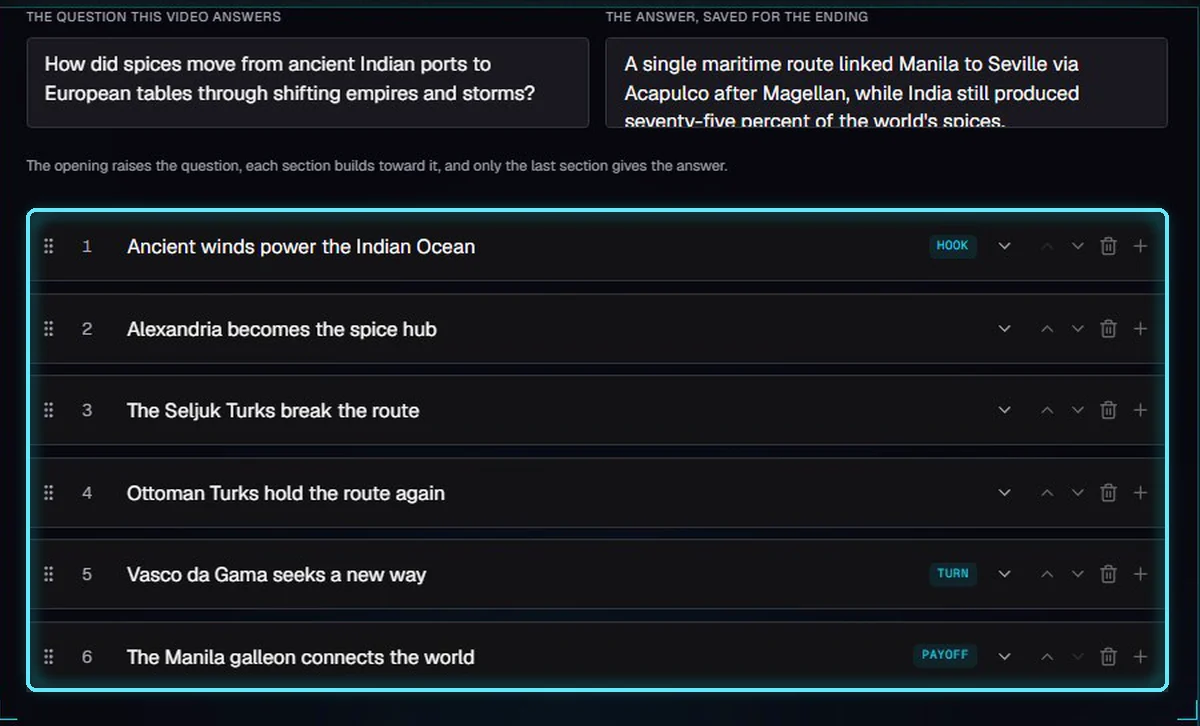
The outline: the question, the answer saved for the end, and six sections.
Edit anything in the outline, then click Generate sections. The AI writes the sections, scores the opening and checks the facts against the research.
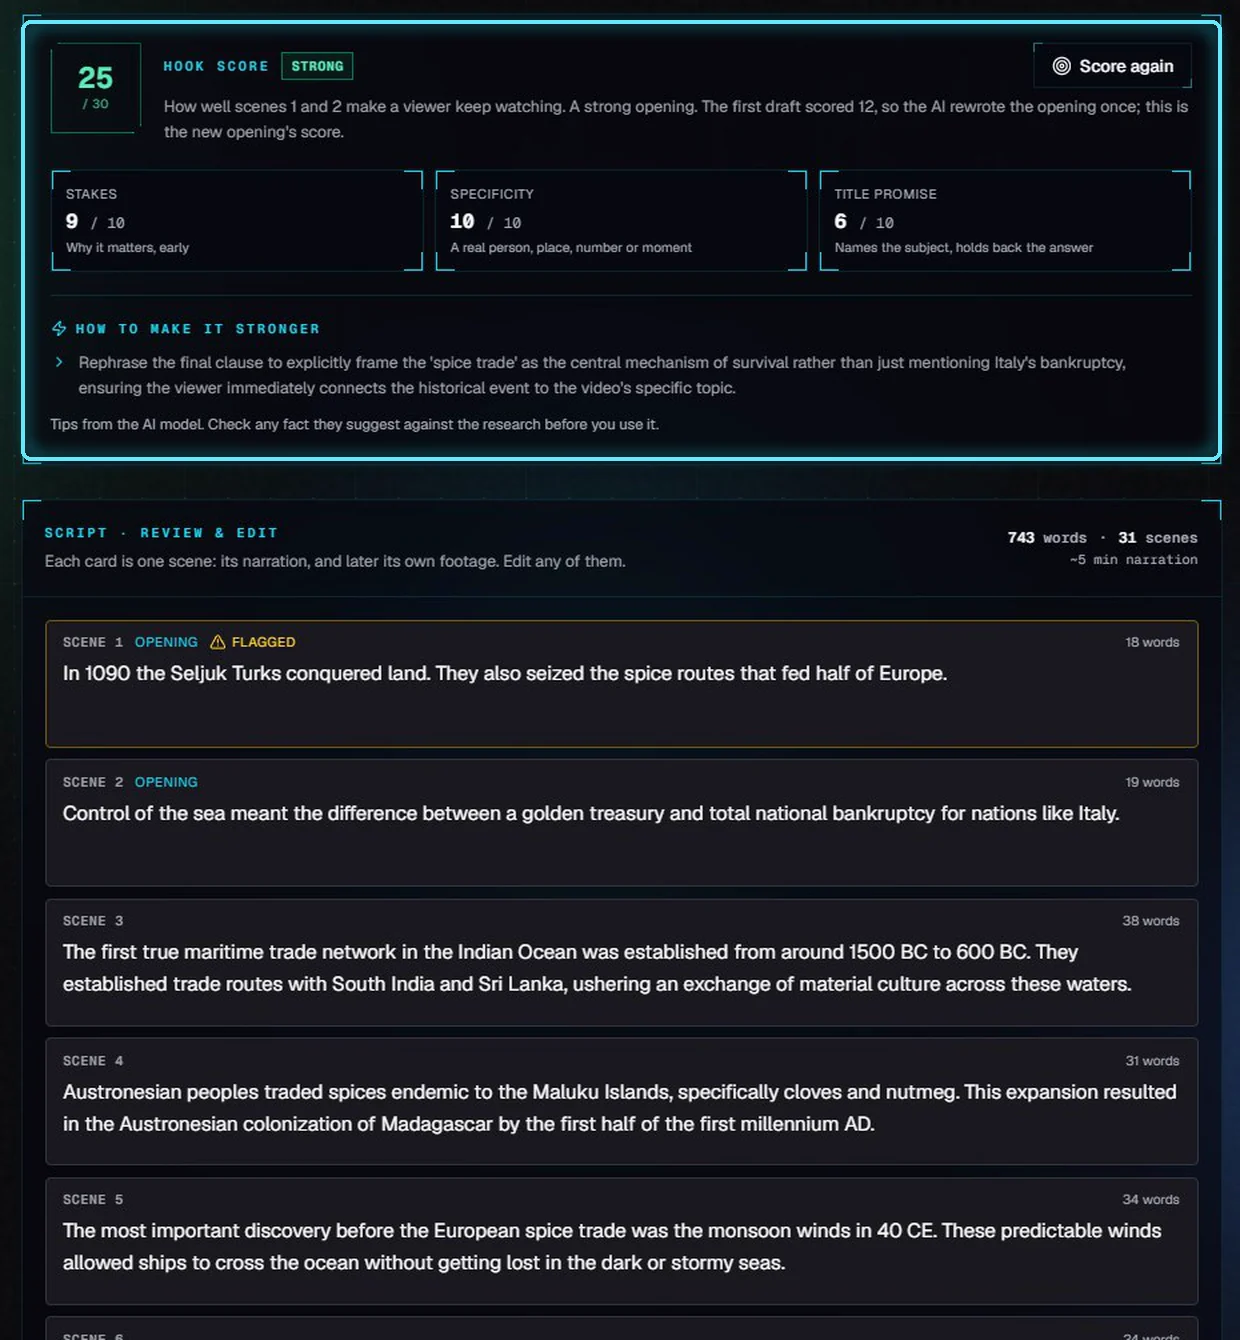
The opening scored 25 out of 30. Five lines were flagged by the fact-check.
Check flagged lines before you go on, then click Continue to voice & visuals. Details: Format, length, tone and hook angle and Outline and script review.
3. Settings and build
In Video settings we picked the voice, Nate the Great. The cost of the build is counted from the script: $0.45, all of it the voiceover. Approve & build made the graphics, the voiceover, the footage and the render in about six minutes. Details: Video settings.
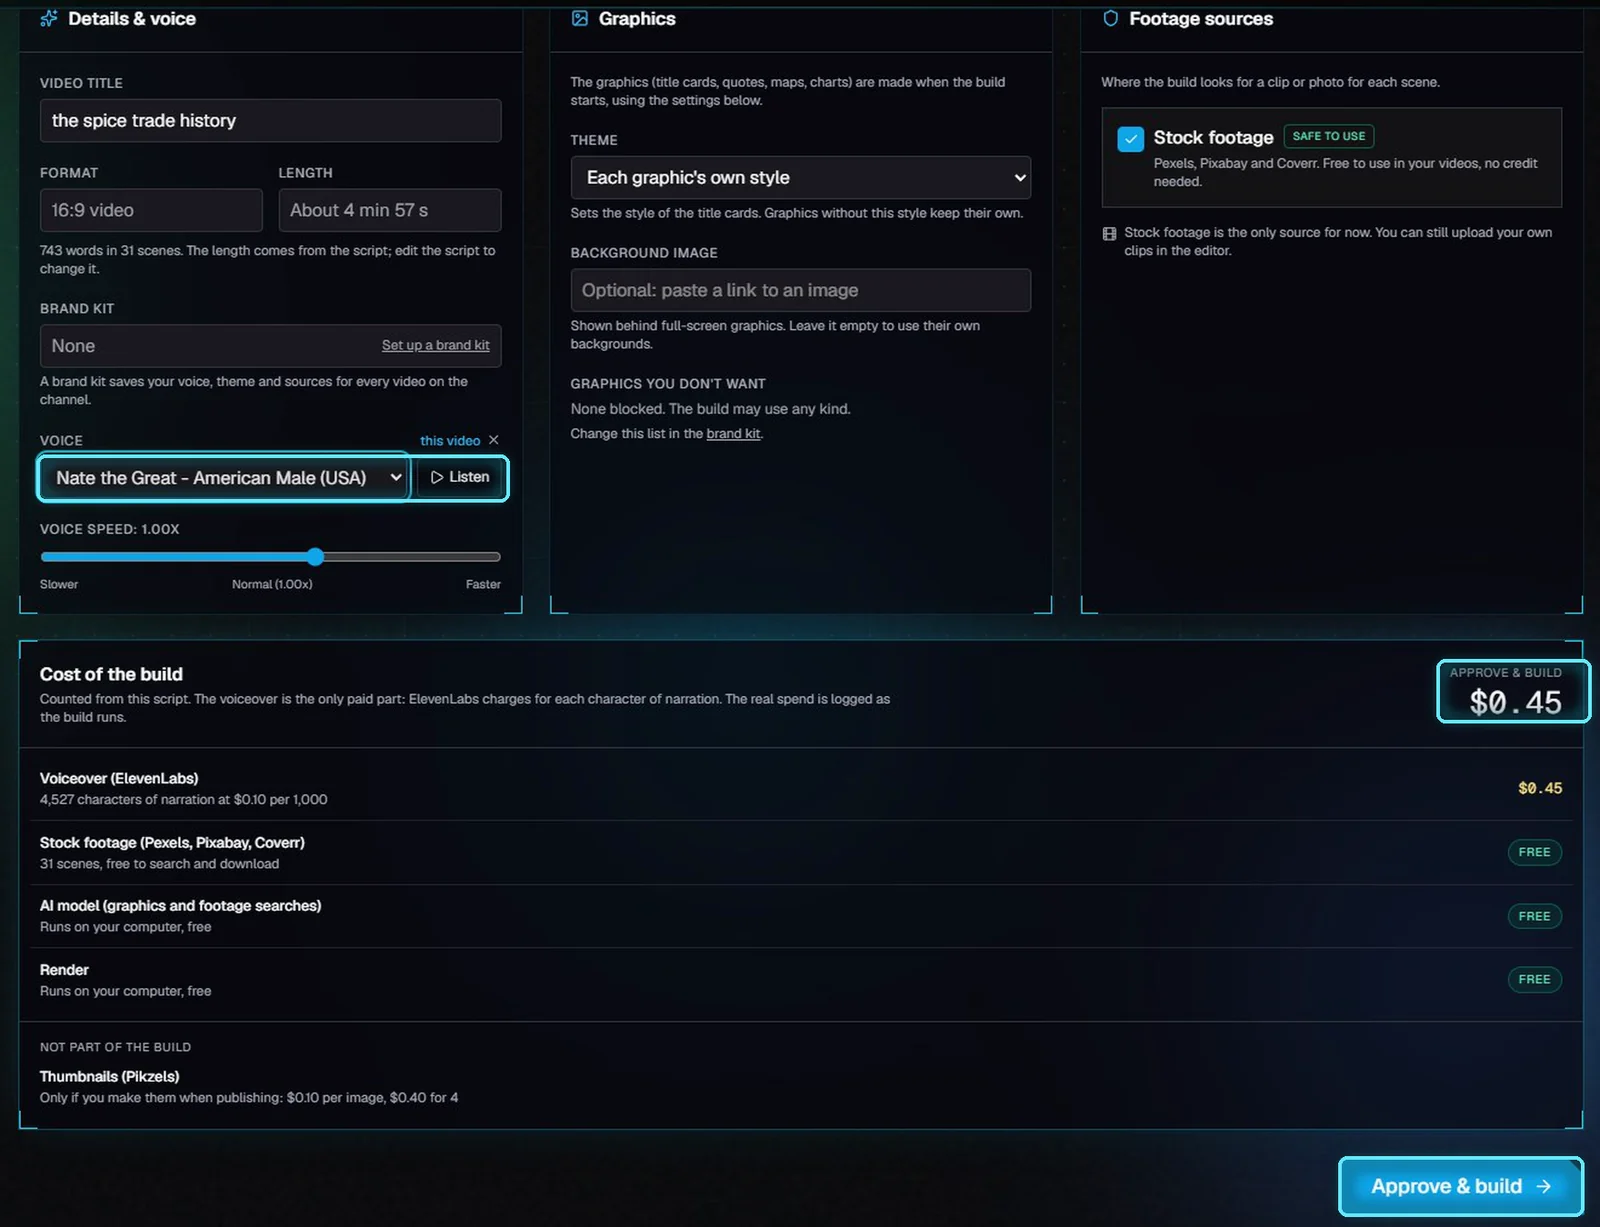
Voice, cost of the build, and Approve & build.
4. Edit in the editor
Swap a clip
Select a scene on the timeline. Its B-roll clips are the stock clips the build found for it; click one to use only that clip. The scene updates in a few seconds. Details: Fix the b-roll.
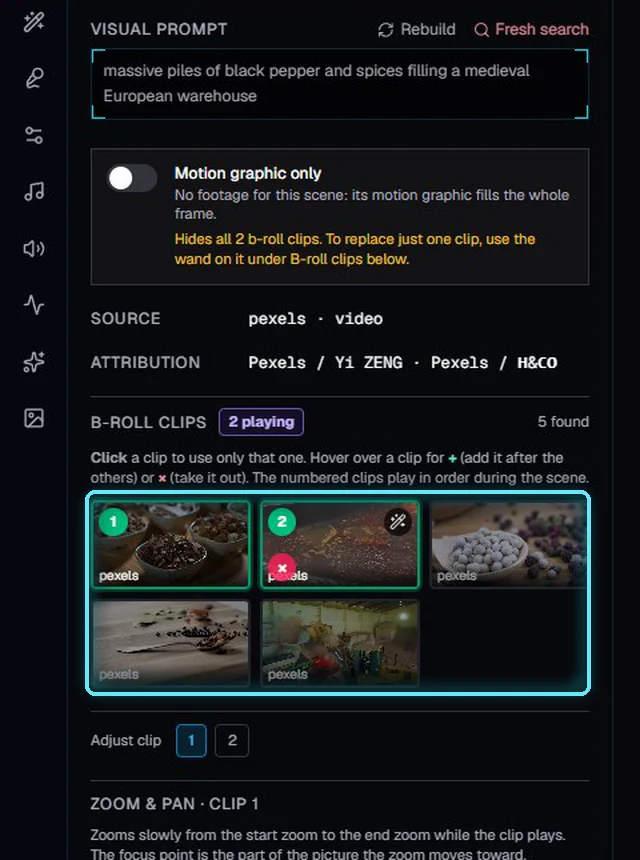
Scene 6 and its B-roll clips.
Add a graphic
Open the Animations library, search, and drag a graphic onto a scene. We dragged a chapter title onto scene 8, where section two begins, typed the number and the title, cleared the subtitle, and clicked Save & render. Details: Motion graphics 101.
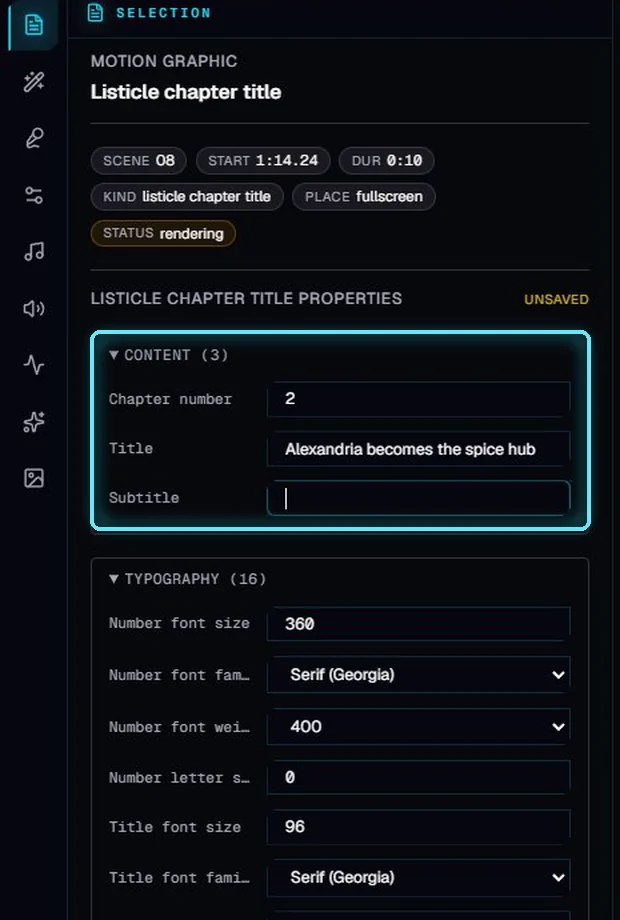
The chapter title's text.
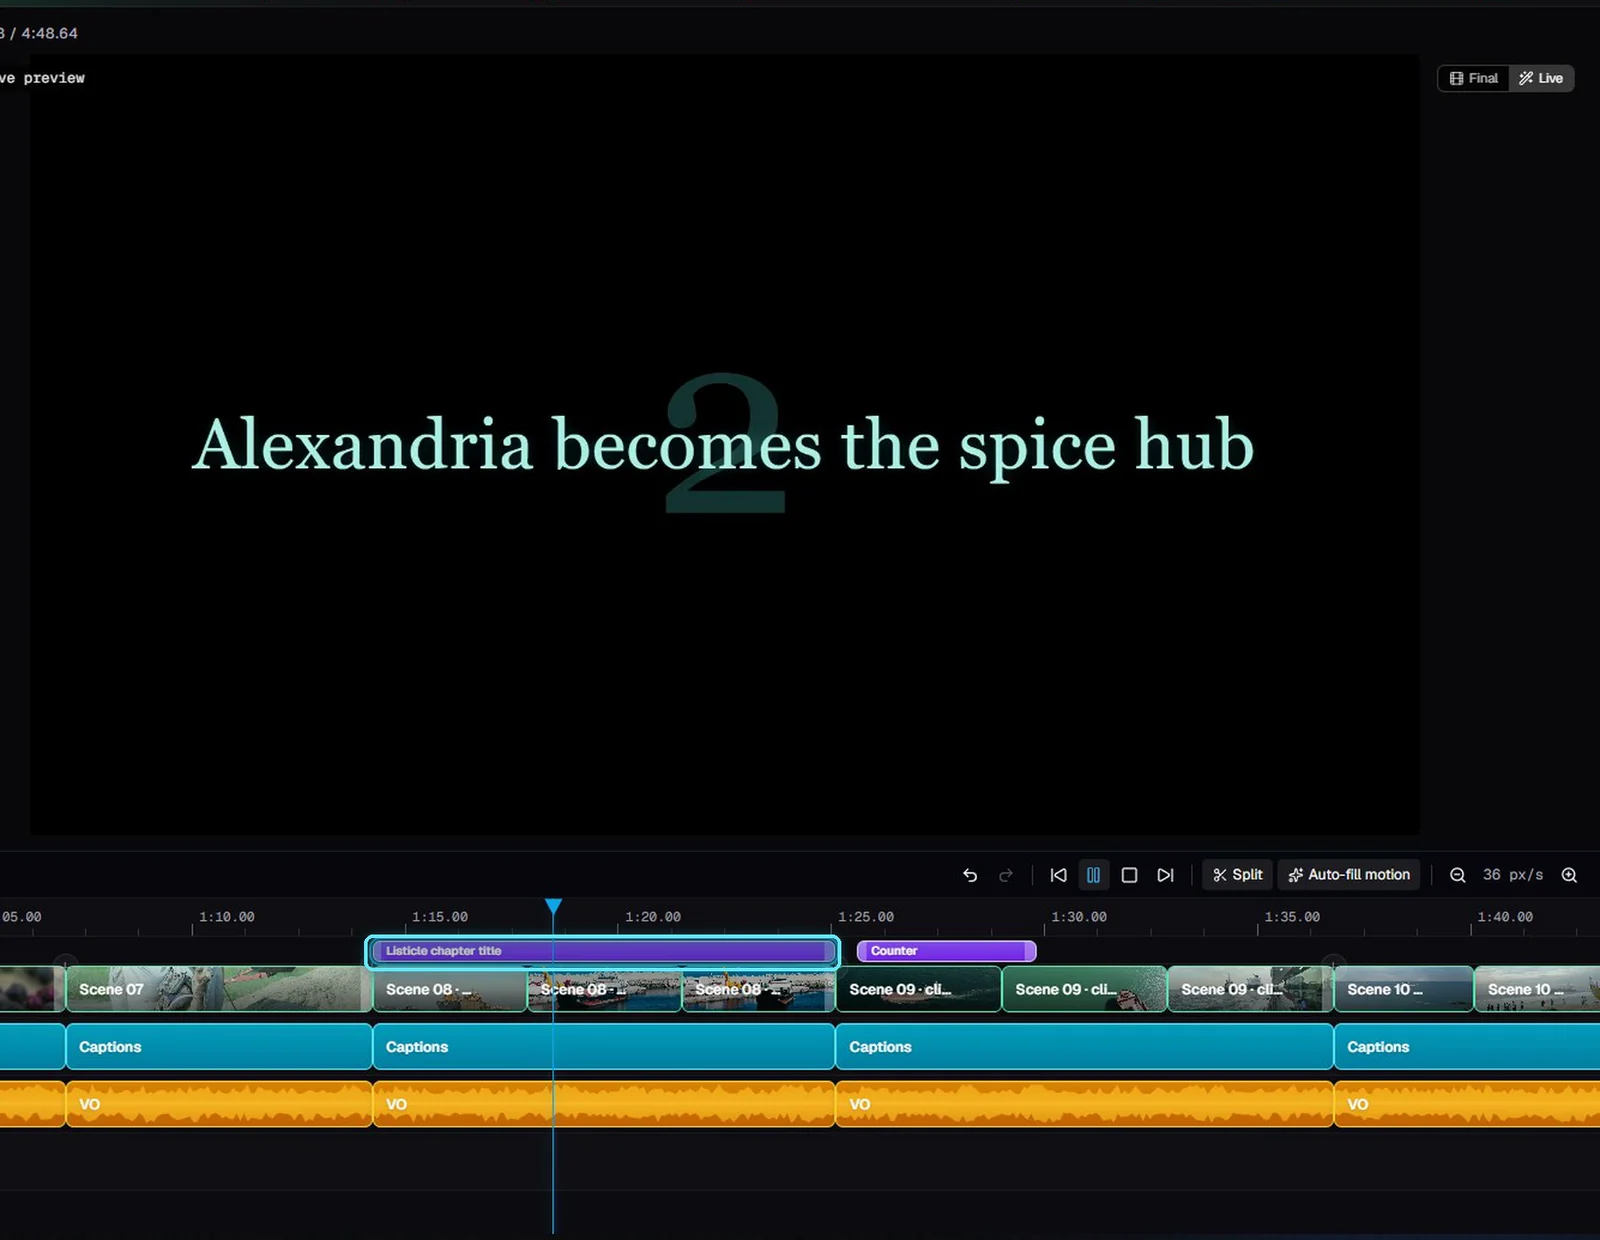
The chapter title on scene 8.
Render
Edits change the project. Click Render to update the video file. It took about thirty seconds here.
5. Make the thumbnail
Open the Thumbs tab. Leave the prompt blank and the AI writes a different idea for each thumbnail from the script; Pikzels paints them, two at a time. We asked for two.
The pencil edits a copy: Pikzels changes only what you ask and keeps the rest. We asked for bright yellow text. Click a thumbnail to use it for the video. Each image uses one Pikzels credit.
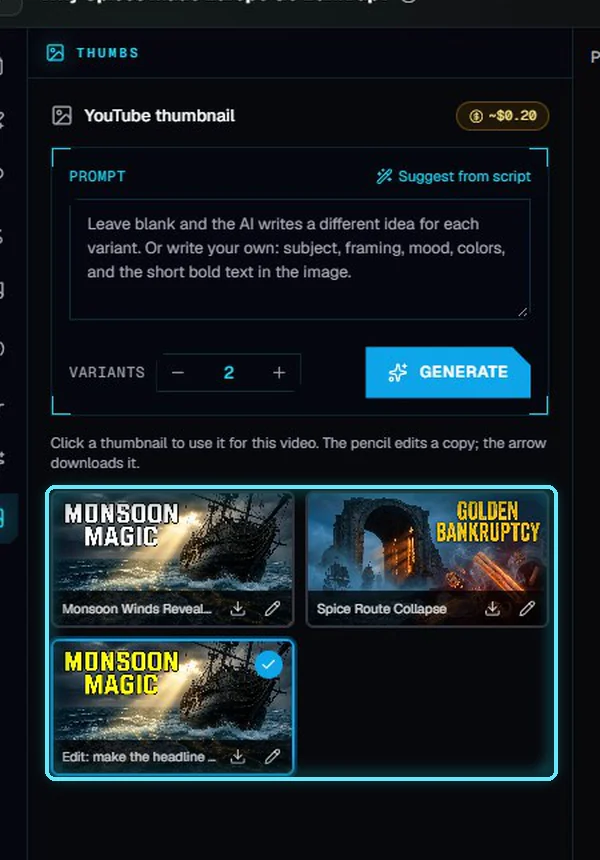
Two ideas, an edited copy with yellow text, and the pick.
6. The finished video
The project page shows the finished video with the thumbnail you picked. From there you can download the MP4, go back to the editor, or publish to YouTube.
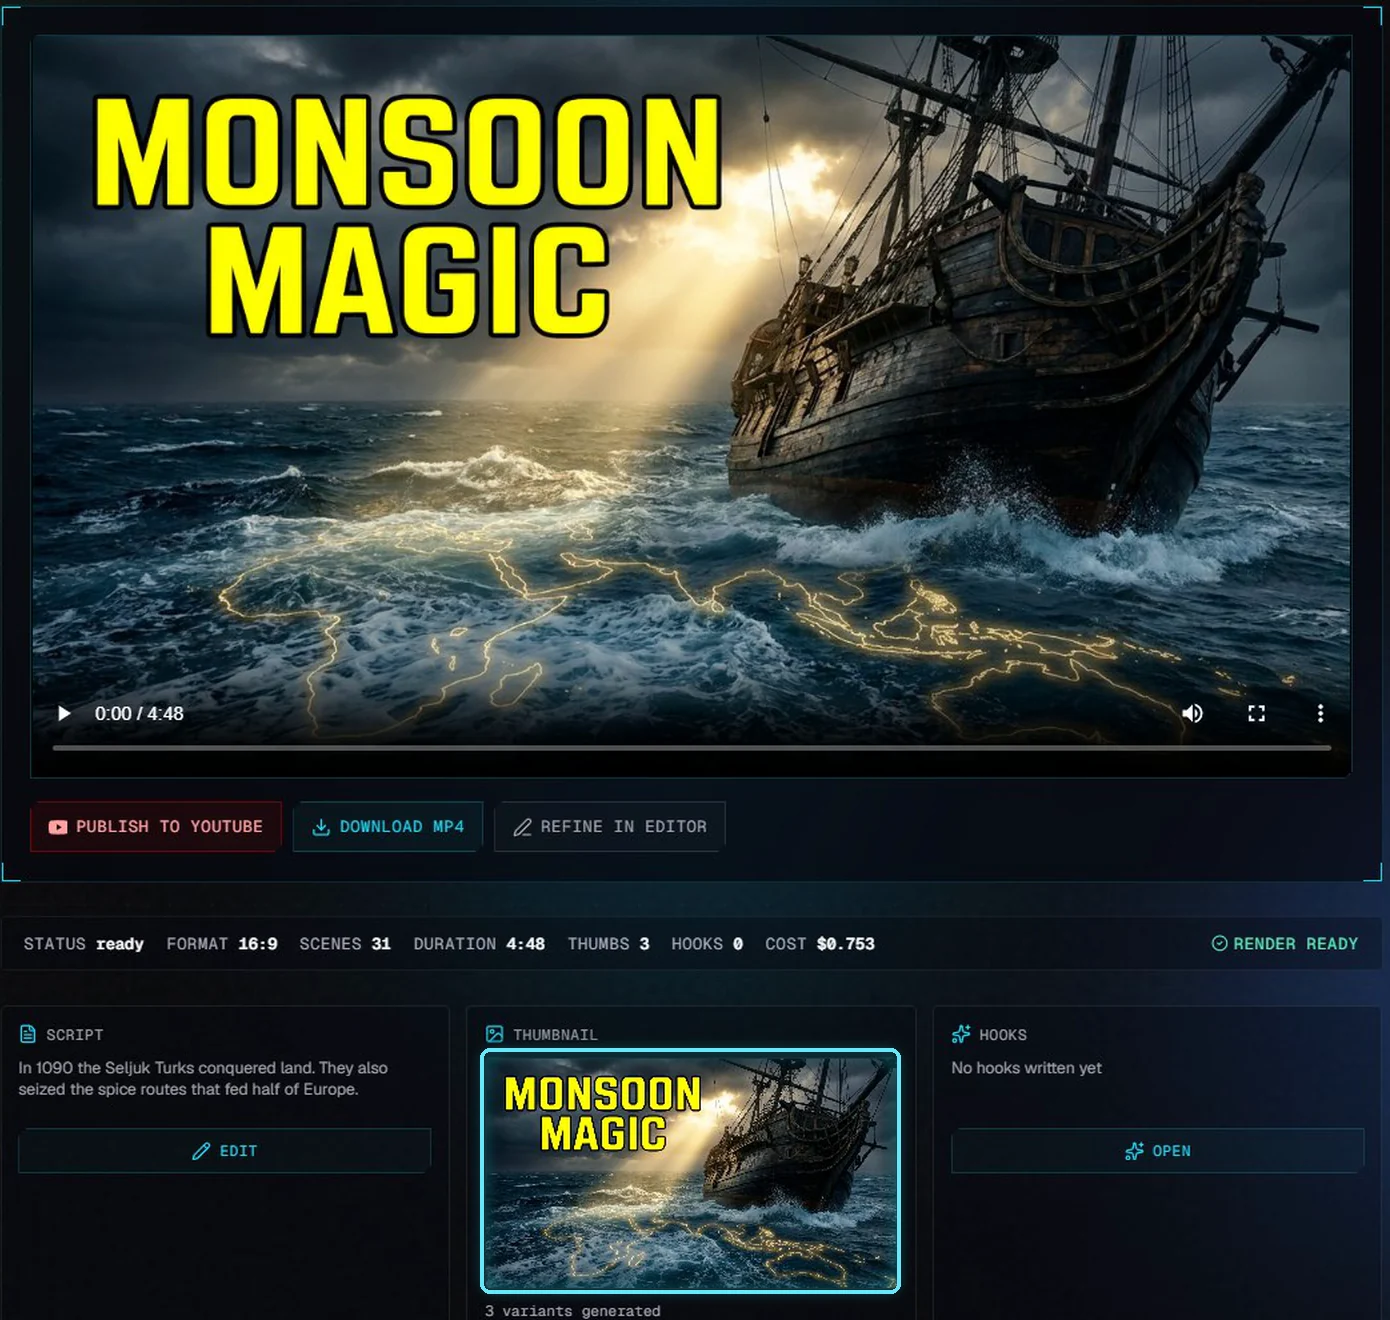
The finished video, 4 minutes 48 seconds.
From keyword to finished video took about 25 minutes, most of it waiting, plus $0.45 of voiceover and three Pikzels images.
Tips
Pick a keyword people really search for. Short names make vague topics.
Fix the outline before you write the script, and check the fact-check flags before you build.
Set the voice and graphics style in Video settings, before the build.
Leave the thumbnail prompt blank for different ideas, then edit the one you like.