
Bring your own voiceover
Make a video from narration you recorded yourself: no AI voice, and nothing to pay for the voice.
If you like to narrate your own videos, record the narration first and give it to VidNexus. It writes down the words it hears, makes a scene for each file, finds footage, adds captions and graphics, and renders the video around your voice.
About these pictures: our two files are narration from the Ice King video on The Food Archive. Any recording works the same way.
1. Upload your recording
Start a new video: on Home, click + and Use my own voiceover, or click New project and the Upload voiceover tab. Pick Landscape or Shorts at the top.
Type a title, or leave it empty to use the first file's name.
Drop your audio files, or click to pick them: MP3, WAV, M4A, AAC, OGG, FLAC, WEBM or MP4, up to 20 files and 100 MB each.
Check the order: file 1 becomes scene 1. Drag a file, or use the arrows, to move it.
Click Upload & transcribe.
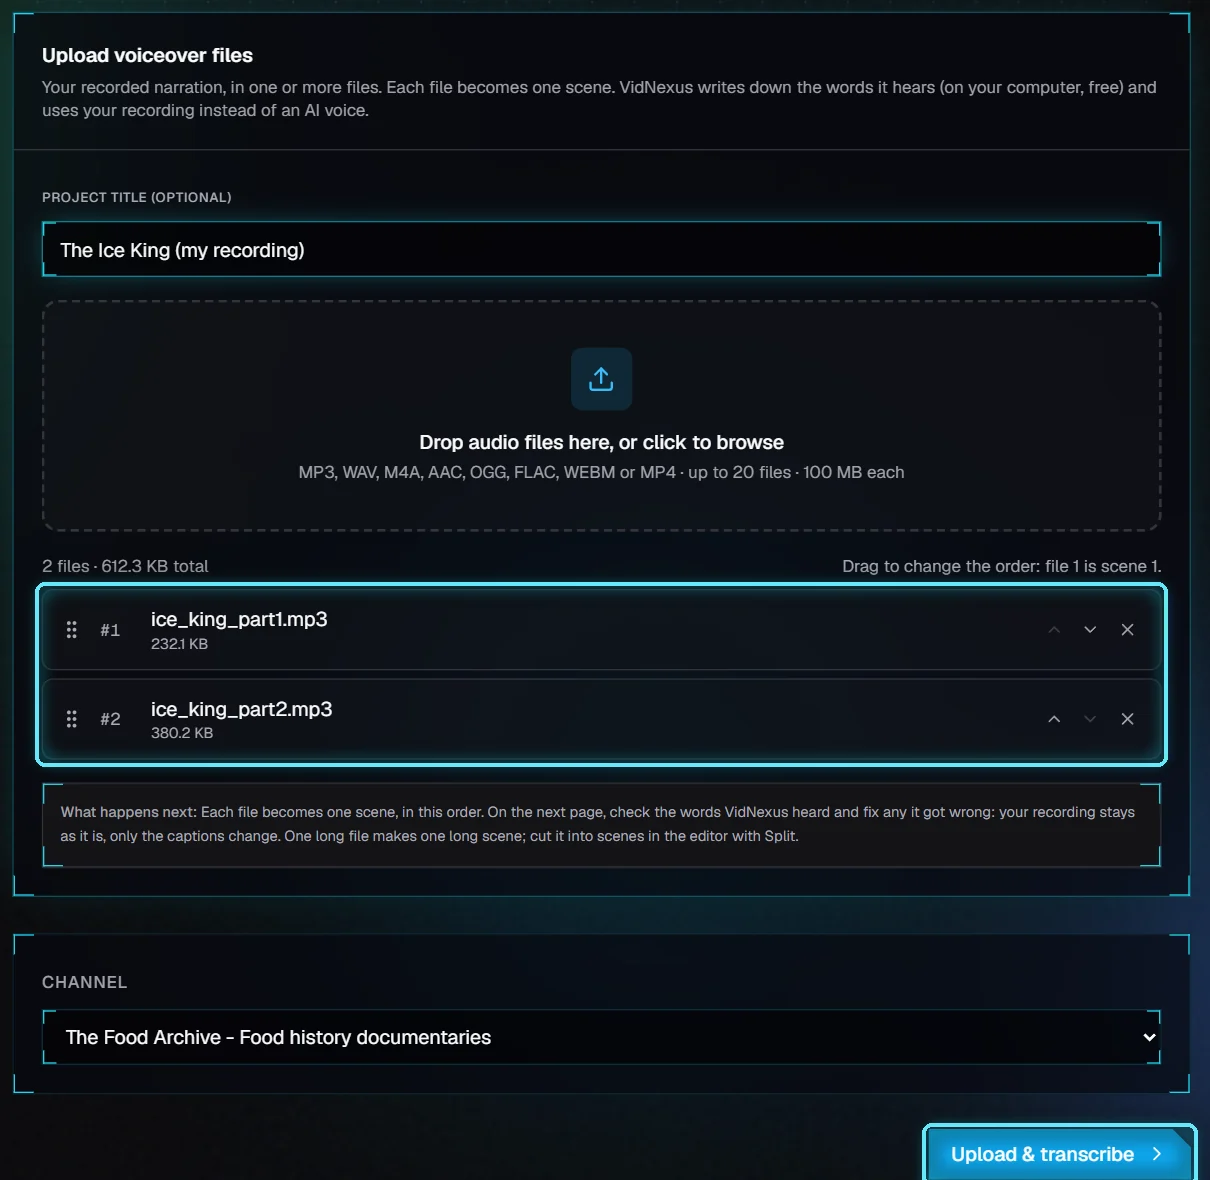
Two files: the first scene, and one longer file we'll split later.
One file or many? Each file becomes one scene, so one file per paragraph is easiest. One long file works too: it becomes one long scene, and you cut it into scenes in the editor (step 5).
2. Check the words
VidNexus listens to each file and writes down the words. This runs on your computer and costs nothing; our two files took about 3 seconds. The first time, it loads the speech model, so it's slower.

Listening to your recording.
Then each file shows as a card with the words VidNexus heard. Read them: names and rare words are often misheard. Click a card and fix the words.
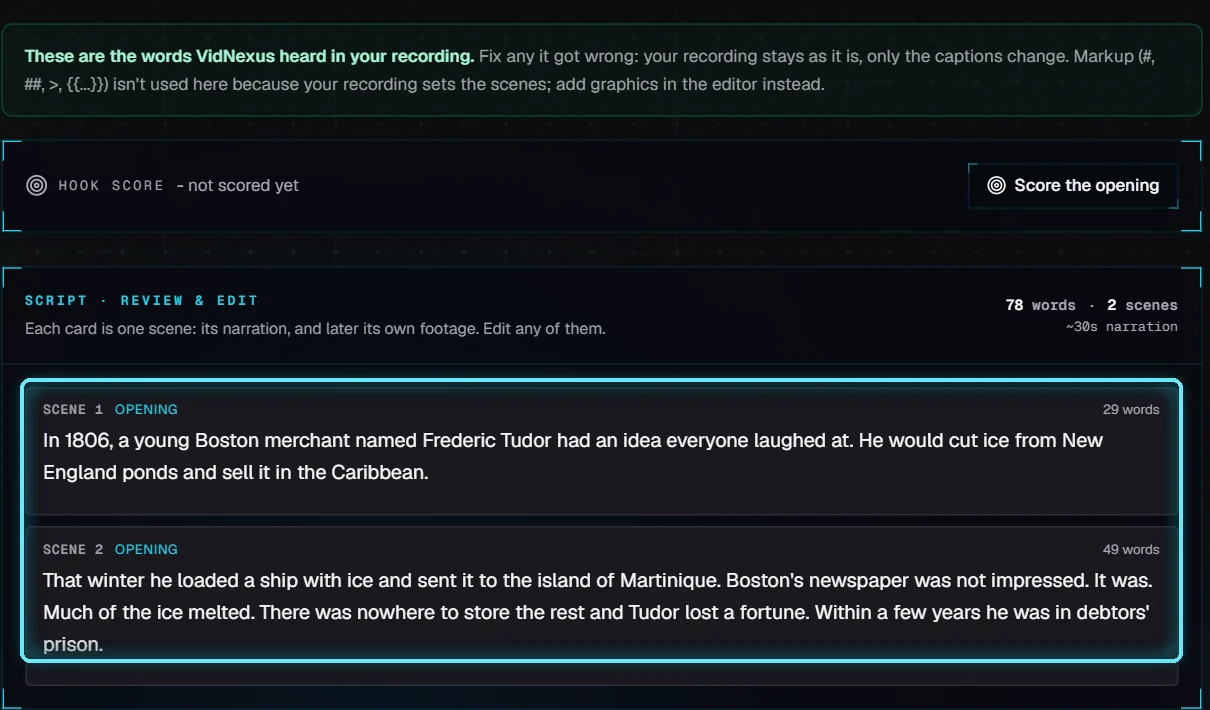
Fixed: "Frederick" became Frederic, "That winner" became That winter, and "tutor" became Tudor.
Fixing words never changes your recording. The captions show the words on the cards, so this is where you make them right. Markup such as # or > isn't used here, because your recording sets the scenes: add title cards and other graphics in the editor. Click Continue to voice & visuals.
3. Video settings: no voice cost
Video settings says Voice: your recording. The AI voice only matters for a scene you add later without a recording. In Cost of the build, the voiceover line says your recording and is free.
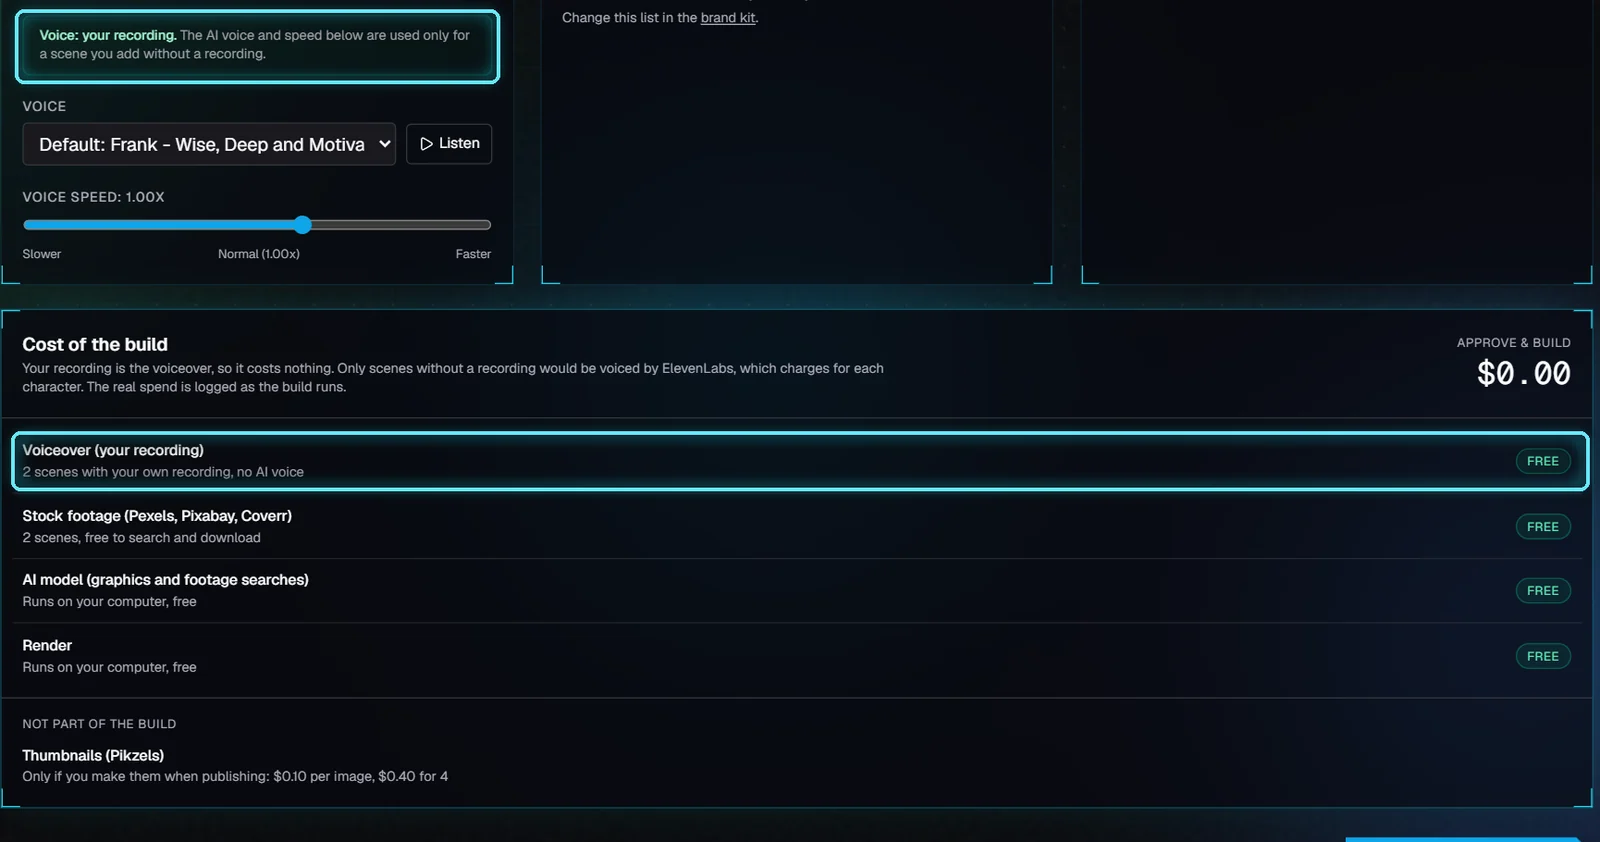
Voice: your recording. Cost of the build: $0.00.
Choose the theme and footage as for any video, then click Approve & build.
4. Build
The build keeps your recording, makes the captions from it, finds footage, draws the graphics and renders the video. Ours took 60 seconds and cost $0.00. A Full rebuild later keeps your recording too.
5. In the editor
Select a scene: where the Regen voice button would be, it says Your recording. VidNexus doesn't offer to replace it with an AI voice. Editing the words here also changes only the captions.
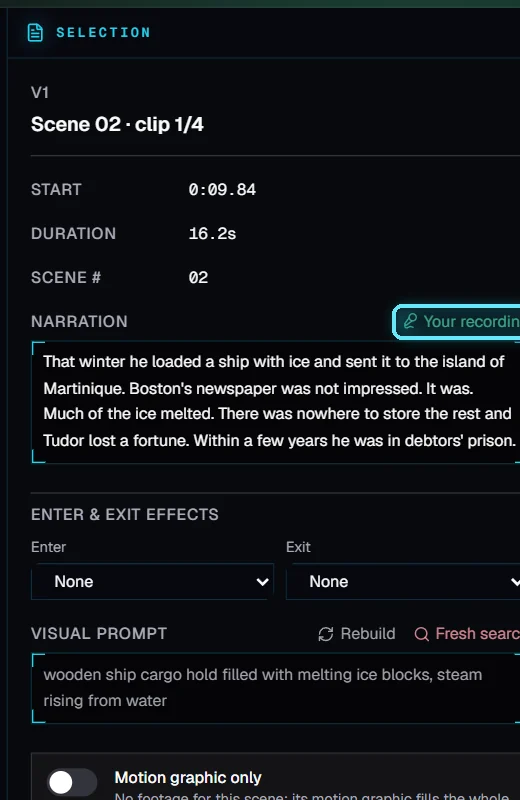
Scene 2: Your recording.
Cut a long recording into scenes
Click on the timeline ruler where you want the cut, between two sentences.
Click Split in the timeline toolbar.

The playhead in the middle of scene 2, and Split.
VidNexus cuts the recording at the nearest word. Both halves keep their piece of your recording, their captions and their footage, and the second half gets its own clip.
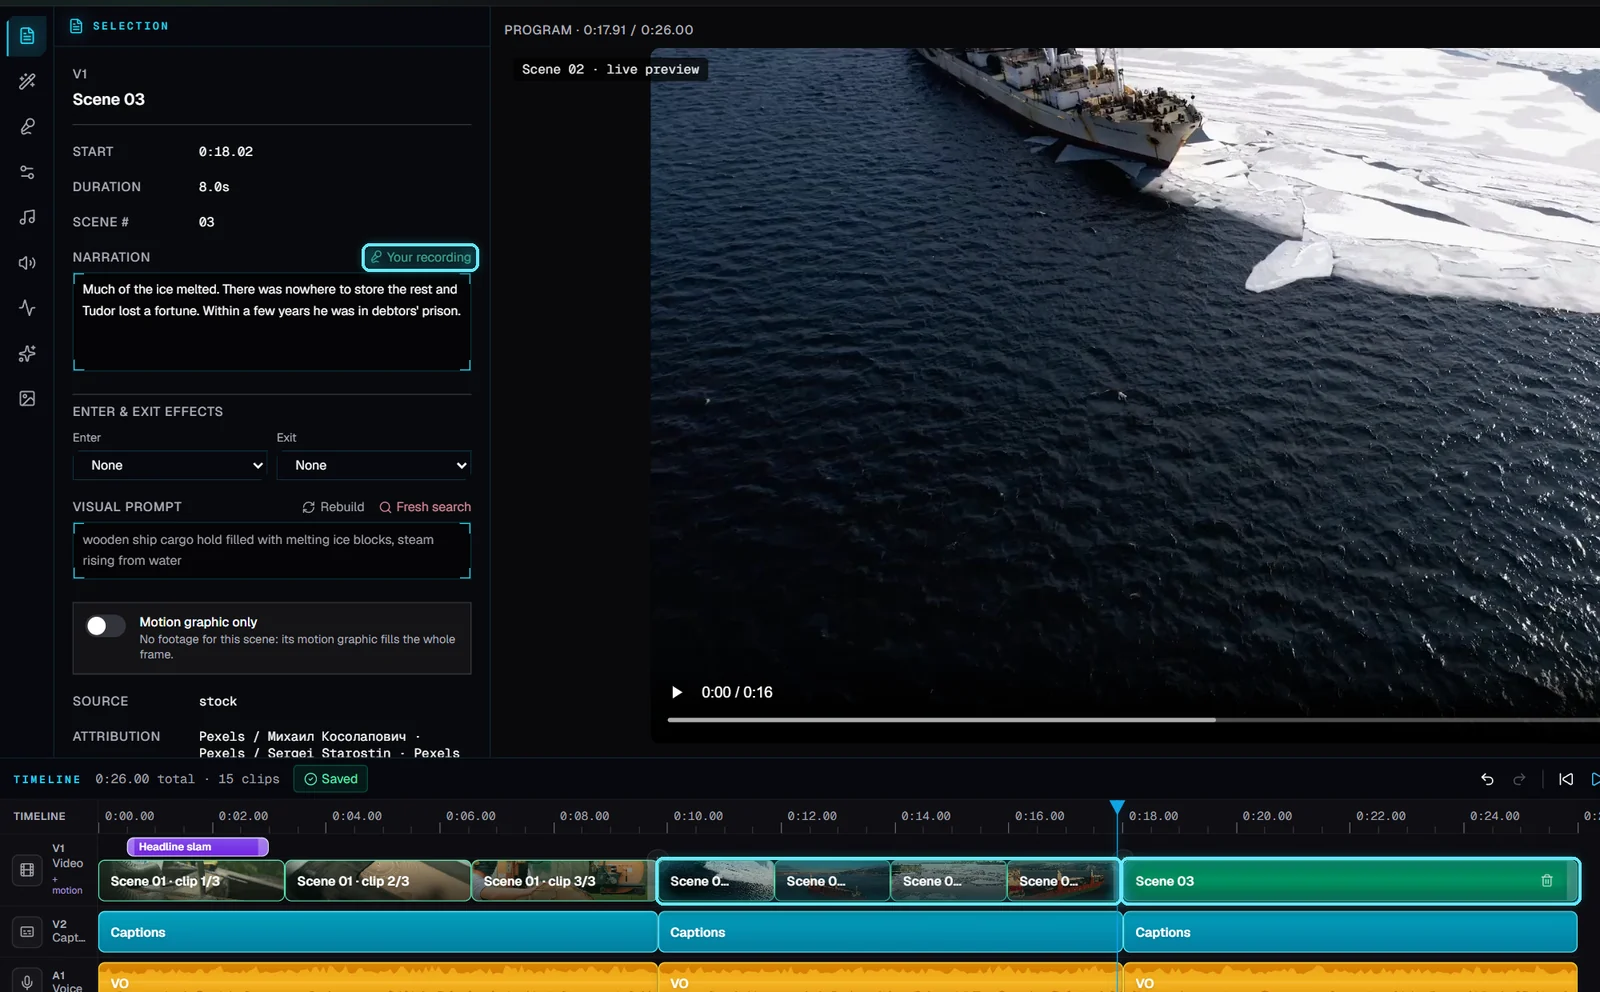
After Split: scene 2 and the new scene 3, both still your recording.
What keeps your recording
You do this | What happens to your recording |
|---|---|
Fix a word in the script or in the editor | Kept. Only the captions take the new word. |
Split a scene | Cut at the nearest word. Each half keeps its piece. |
Full rebuild or Render | Kept. No ElevenLabs, no charge. |
Add a new scene, or replace the script from Research | The new scenes have no recording, so ElevenLabs voices them (and charges). |
Next: Edit scenes on the timeline.
Tips
Record in a quiet room, close to the microphone. VidNexus evens out the volume between files, but it can't remove echo or noise.
Export WAV or MP3. Keep each file under 100 MB: about an hour of MP3, or 9 minutes of CD-quality WAV.
Say names clearly and fix them on the cards: the captions are only as right as the words there.
For a video you started another way, add recordings one scene at a time: select the scene in the editor and click Use my recording under its narration. The scene's length follows the recording, and Use an AI voice instead switches back.
Troubleshooting
"... isn't an audio file VidNexus can use." Only the formats above work. Export the recording again as MP3 or WAV.
"... couldn't be read as audio." The file is damaged or isn't really audio. Check that it plays on your computer, export it again, and start a new video with it.
It's taking very long. Long recordings take a while, and the first time loads the speech model. Wait a minute and reload the page; if nothing changes, use Report an issue.
A card says "No words heard". The file is silent, or the voice is too quiet. Type the words yourself so the captions are right.