
A tour of the editor
Transitions, footage, motion graphics and narration, then render.
A 4-minute video version of this guide will play here. Everything it shows is written out below.
The editor is where you change anything in a finished video: swap a clip, add a transition or a motion graphic, or fix a line of narration. This guide walks through each one on the video from tutorial 02, then renders the changes into a new MP4.
1. Find your way around
Open a finished project and click Refine in editor. The editor has four areas:
Project bar (top): the estimated cost, Edit with AI, Export and Render.
Player (middle): Final plays the rendered video. Live previews your edits straight away, scene by scene, before you render.
Inspector (left): the selected clip, plus tabs for the animation library, voice, settings, music, sound effects, pacing, hooks and thumbnails.
Timeline (bottom): the video track with motion graphics on top, then captions, voice, music and sound effects.
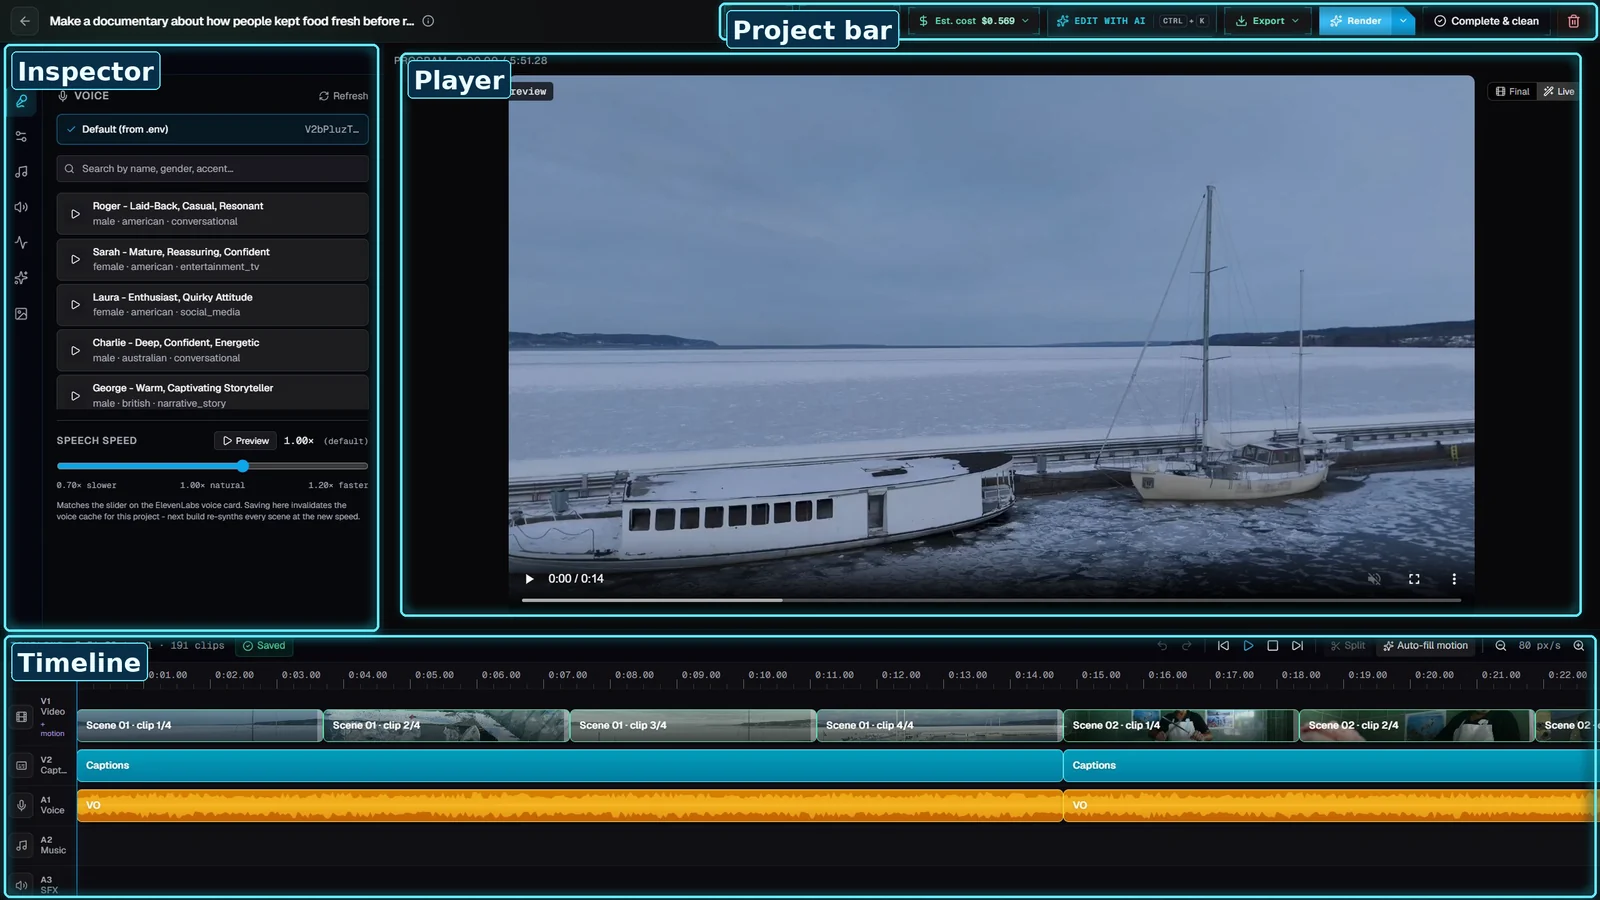
The four areas of the editor.
Press Space to play or pause, click the ruler to jump to a moment, and use the zoom buttons to see more or less of the timeline.
2. Add a transition
By default, each scene cuts straight to the next. To change that, click the plus button on the timeline between two scenes and pick a transition:
Crossfade blends one scene into the next.
Fade goes through black. Slide and Slide up push the next scene in. Zoom punches through, and Wipe wipes across with a soft edge.
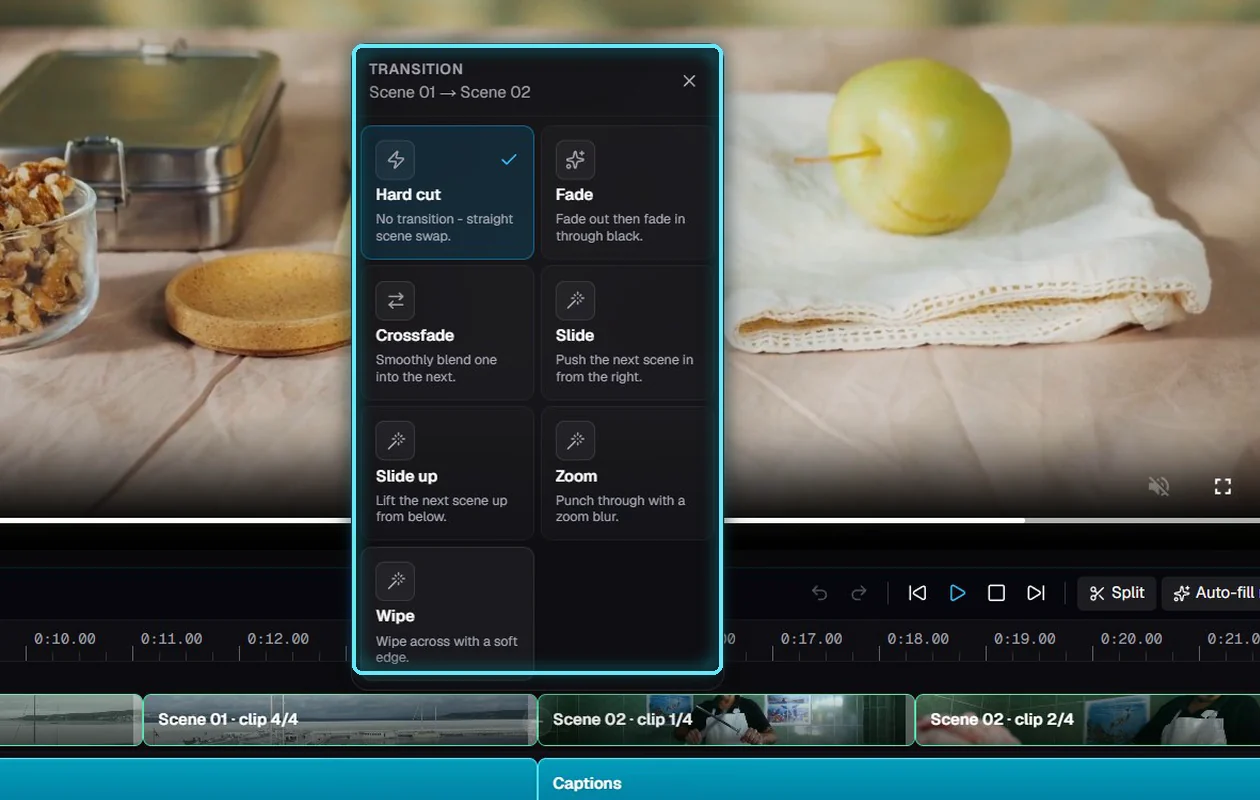
Pick a transition for the cut between two scenes.
The chip on the timeline shows the transition. Click it to change it or remove it.

A crossfade between scene 1 and scene 2.
3. Swap the footage
Click a scene on the timeline to select it. The inspector switches to the Selection tab, with everything about that scene.
Under B-roll cycle are the clips VidNexus found for this scene. The highlighted ones play in turn. Click a clip to use just that one; the scene is re-cut in a few seconds. Hover over a clip for + and x to add it to the cycle or remove it.
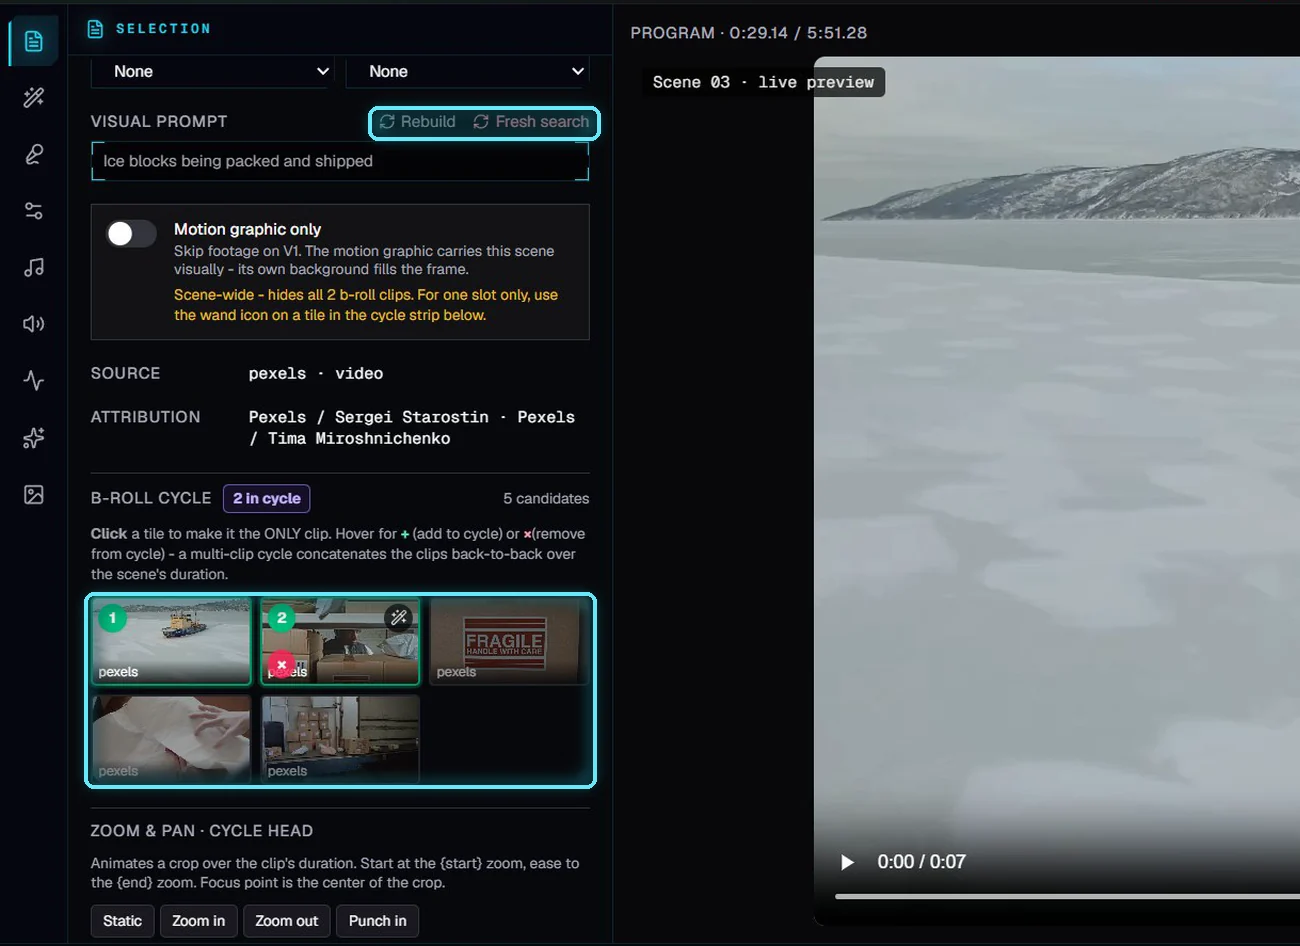
The B-roll cycle for a scene, with Fresh search at the top.
Zoom & pan adds camera movement: Static, Zoom in, Zoom out or Punch in, which starts wide and slowly pushes in. You can also set the start and end zoom and the focus point.
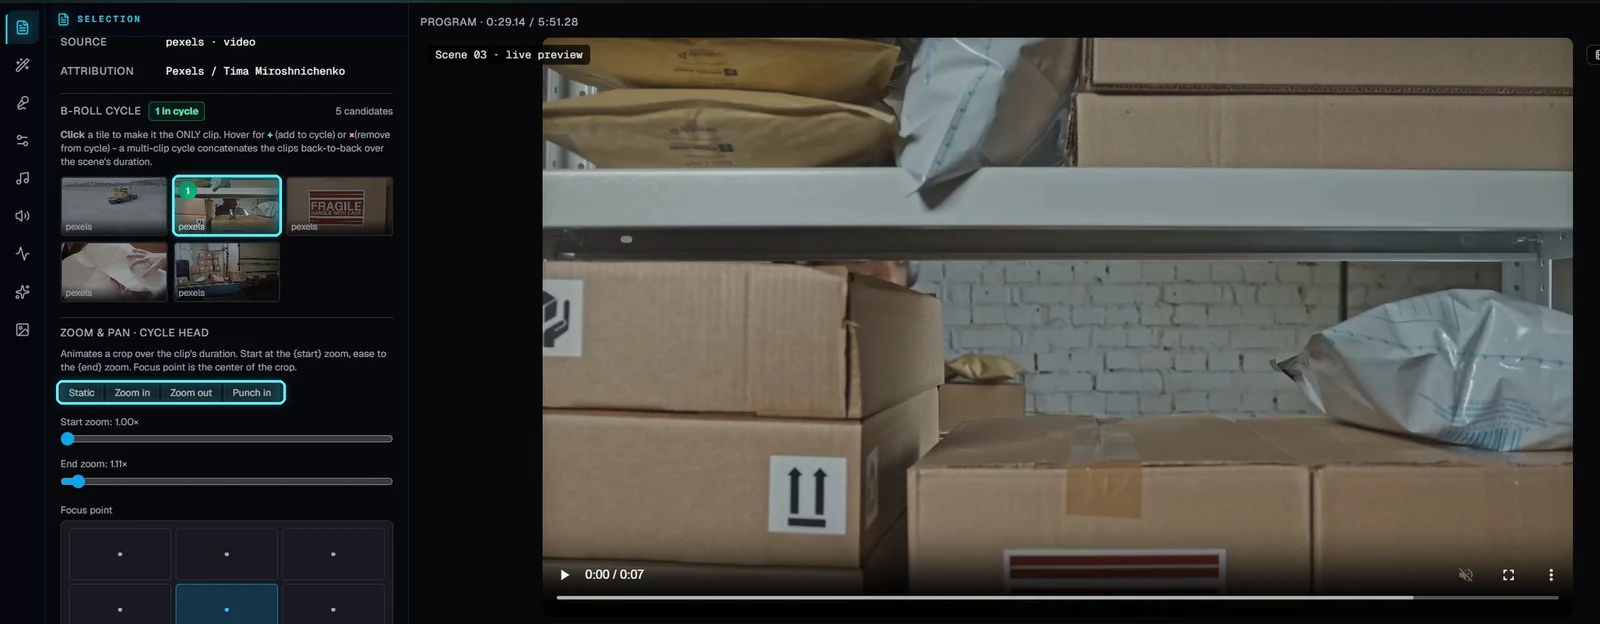
One clip chosen for the scene, with Punch in.
If none of the clips fit, change the visual prompt and click Fresh search to look for new footage.
4. Add a motion graphic
Motion graphics live in the Animations tab. Hover over a tile to preview it, or search by name.
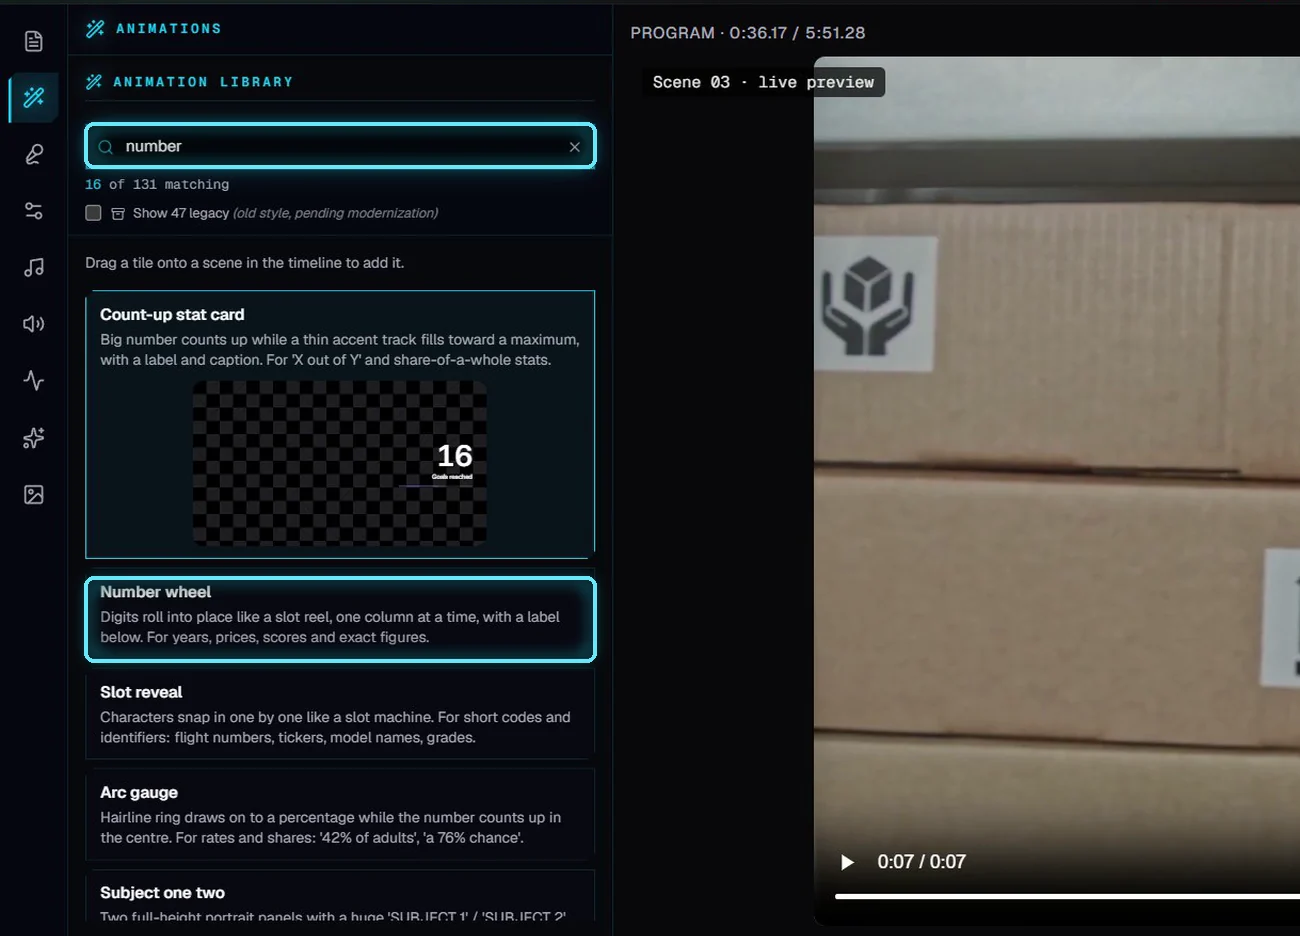
The animation library, searched for "number".
Drag a tile onto a scene in the timeline. It shows up as a purple strip on top of the scene. Click the strip to edit it: each kind has its own fields, like the value and label of a number wheel.
When you're done, click Save & render.
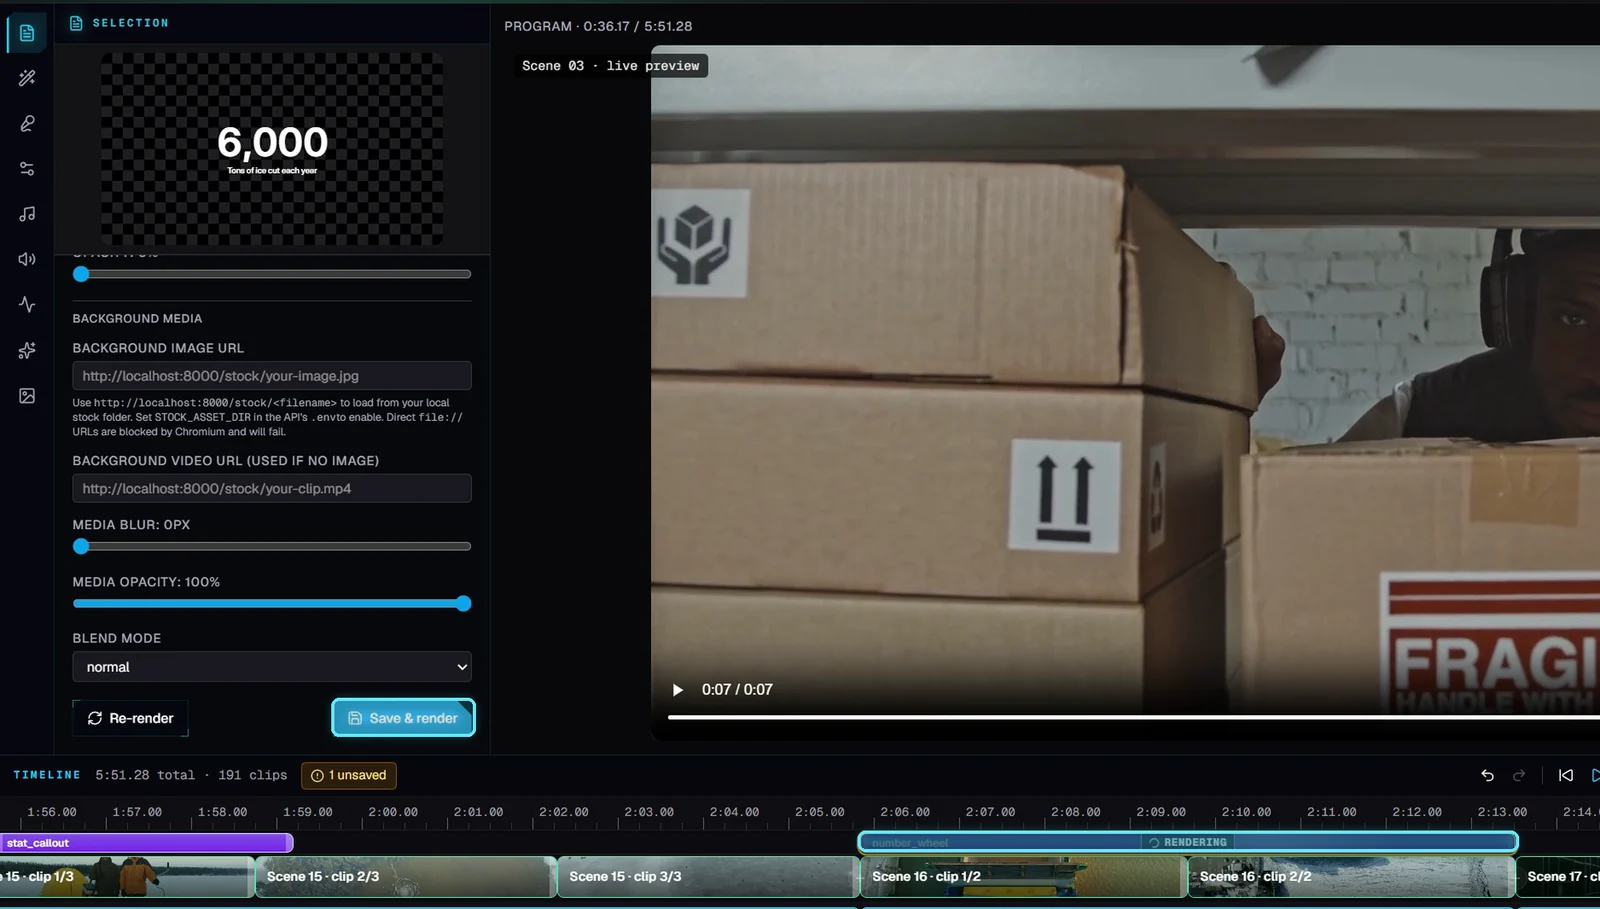
Number wheel settings, and the new strip on scene 16.
The Live preview shows the graphic on the footage right away.
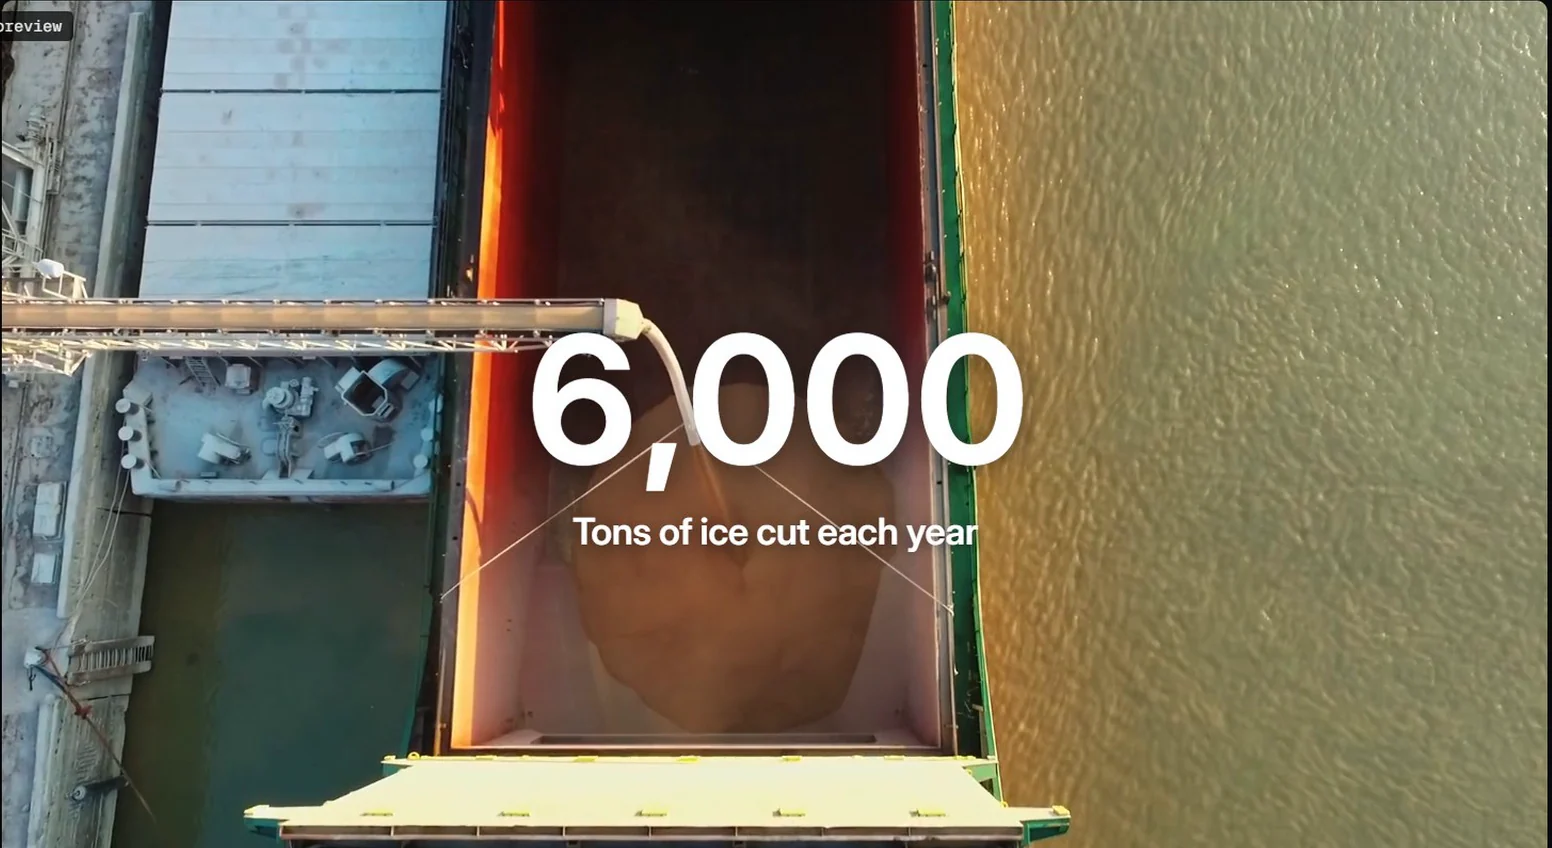
The number wheel in the Live preview.
5. Fix a line of narration
Select the scene and edit its narration in the inspector. Here, a line about the ice's origin now reads "from New England's frozen lakes" instead of "from Walden Pond", a claim fact-check had flagged.
Then click Regen voice. VidNexus records the new line and updates the scene's captions to match. Only this scene uses ElevenLabs credit.
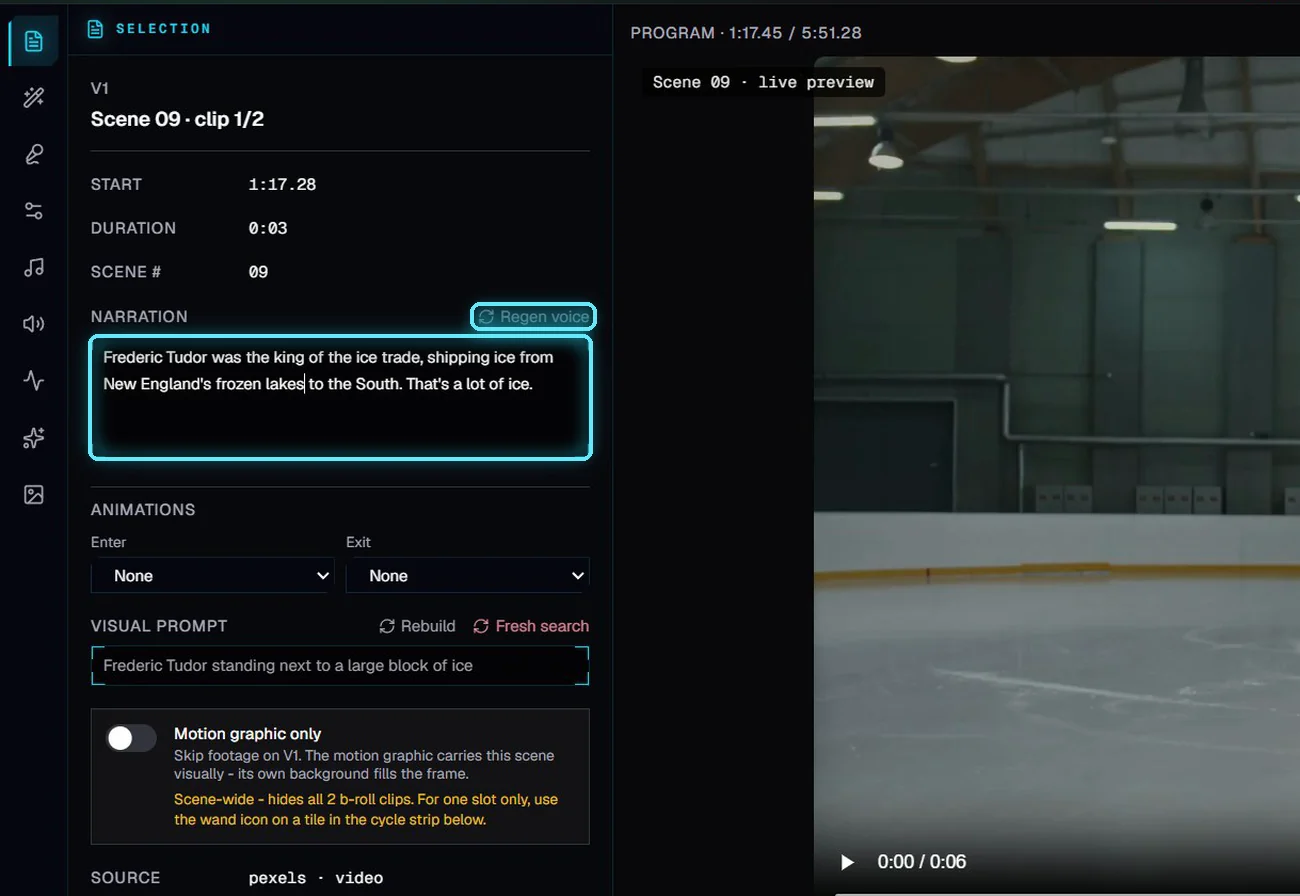
The edited narration and Regen voice.
6. Render your changes
Your edits are saved as you go, but the video file only changes when you render. Click Render.
Change | When it reaches the video |
|---|---|
Transition, trim, footage, zoom | Saved straight away. Shows in the Live preview; in the video file after Render. |
Motion graphic | Click Save & render. Shows in Live right away; in the video file after Render. |
Narration | Saved when you click away. Click Regen voice, then Render. |
Render rebuilds the video from what you already have, so it doesn't use any API credit. On our test machine it took about a minute. The project bar shows the stage while it runs.

Rendering in progress.
When it's done, the player switches back to Final with every change in place.
To take the video with you, open Export:
Download MP4: the final render.
FCP 7 XML: opens in DaVinci Resolve.
SubRip SRT: the subtitle track.
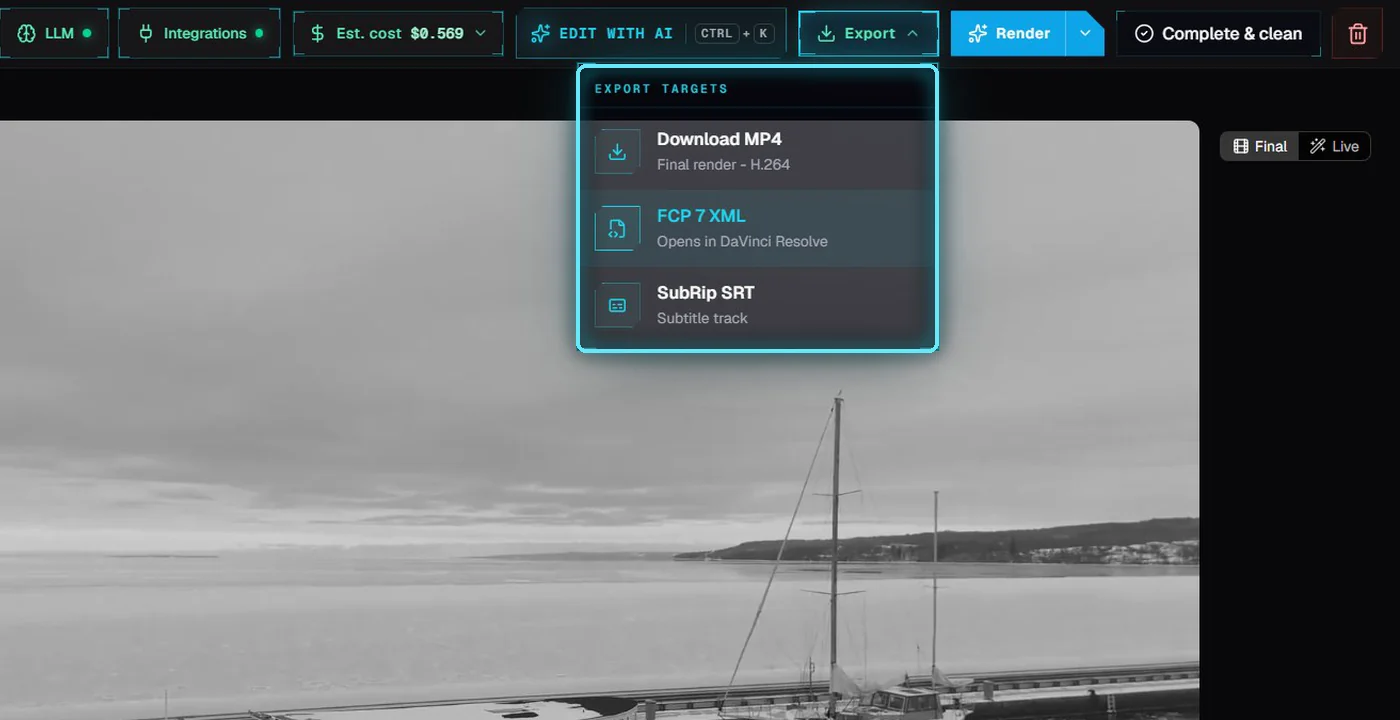
Export targets.
For a full rebuild instead (voice, captions, motion graphics, footage and render), use the arrow next to Render and choose Full rebuild. Scenes that haven't changed don't use credit again.
The next tutorial, Set up a brand kit, gives every video on a channel your logo, voice and sourcing rules.
Troubleshooting
Render stops with "scene missing voiceover". A scene's narration was edited but its voice wasn't regenerated. Select it and click Regen voice, then render again.
A scene has no footage after editing the visual prompt. Click Fresh search on that scene so VidNexus finds footage for the new prompt.
My change isn't in the downloaded video. Live shows edits immediately, but the MP4 only changes after Render.