
Music and sound effects
Add a music bed and sound effects to a video, and set how they sit under the narration.
VidNexus builds a video with narration only. In the editor you can add background music, set how loud it plays, let it dip under the voice, cut scenes on its beats, and place sound effects on the cuts. This guide does all of that on a copy of the food-preservation video from the first-video tutorial.
Music and sound effects come from your own library: two folders on your computer that you fill with files you have the rights to use, like your own recordings, royalty-free tracks or music made with an AI music tool. The examples here were made with ElevenLabs Music.
1. Add music to your library
Open the project in the editor and click the Music icon (the note) in the strip on the left. The first time, the library is empty and the tab shows its folder on your computer.
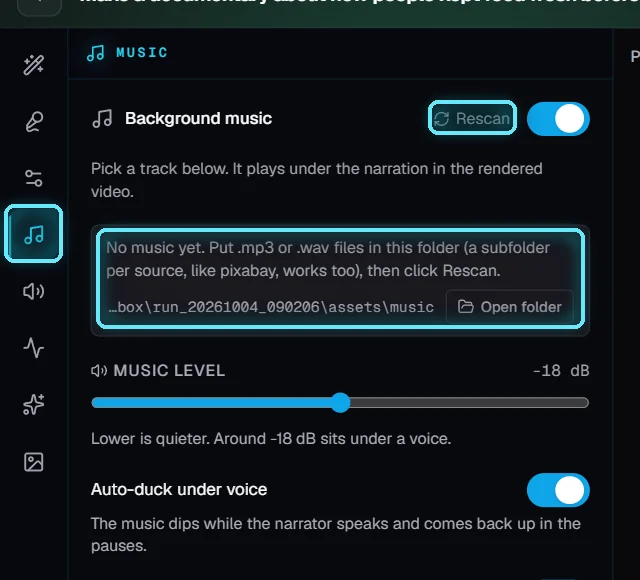
An empty music library, with its folder and the Open folder button.
Click Open folder. The folder opens in File Explorer.
Copy your .mp3 or .wav files into it. A subfolder per source, like pixabay, keeps them sorted; the subfolder name becomes the track's source.
Back in VidNexus, click Rescan.
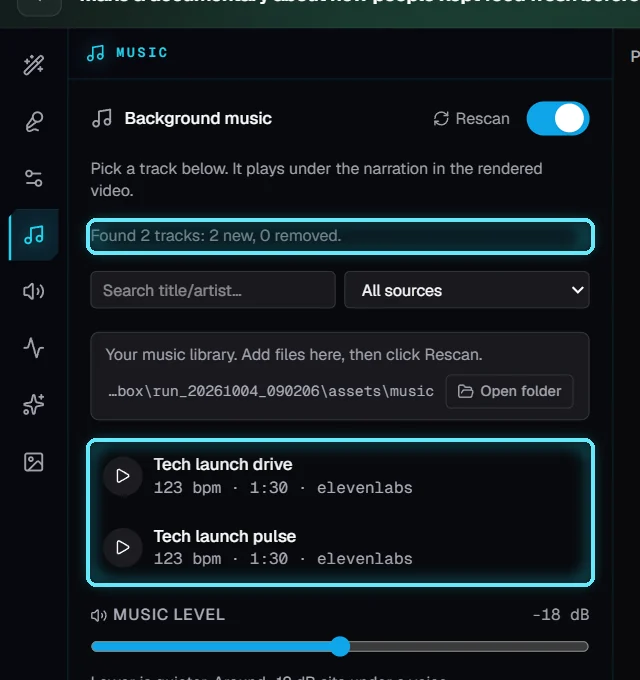
Rescan found two tracks.
Titles come from the file names. To set a title, artist or BPM yourself, add a small <name>.meta.json file next to the track (all fields are optional).
2. Pick a track
Click the play button on a track to hear it, and again to stop. Click the track's name to use it in this video.
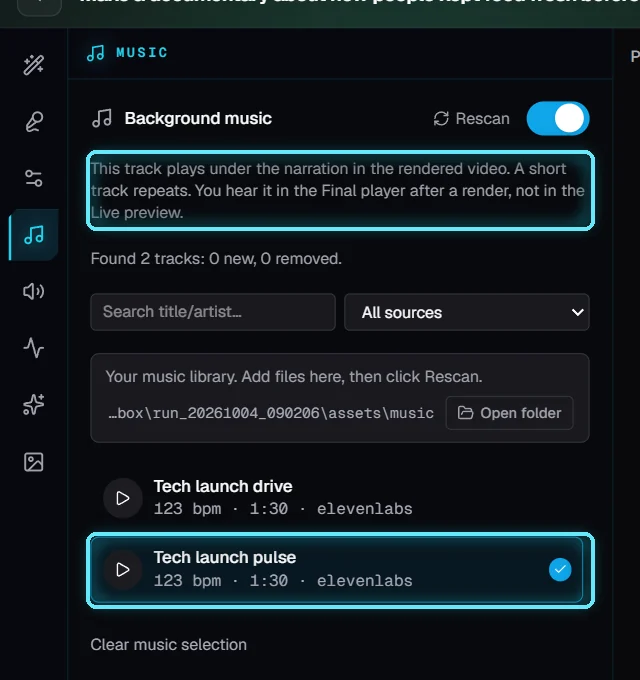
Tech launch pulse picked for this video.
The track appears on the A2 Music lane of the timeline. A track shorter than the video repeats.

The music on the timeline.
You hear the music in the rendered video (the Final player after a render), not in the Live preview. The Background music switch at the top turns it off without losing your pick.
3. Level, auto-duck and loudness
Music level sets how loud the music plays, from -30 dB (quiet) to -6 dB. Around -18 to -20 dB sits under a voice. We used -20 dB.
Auto-duck under voice makes the music dip while the narrator speaks and come back up in the pauses.
Normalize to -14 LUFS sets the finished video to the loudness YouTube plays at, so YouTube doesn't turn it down and it doesn't sound quiet next to other videos. It works with or without music.
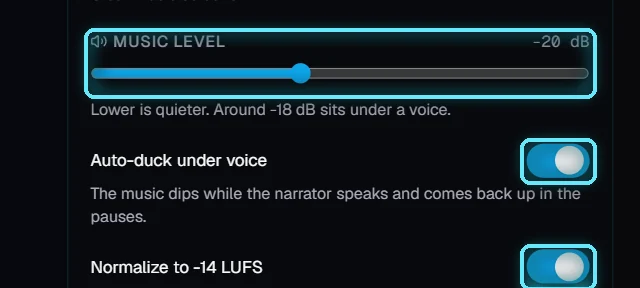
Music level at -20 dB, with auto-duck and -14 LUFS on.
4. Beat-sync cuts
Beat-sync cuts moves each cut between scenes to the next beat of the music, up to 0.6 seconds later, so the pictures change on the beat. The beats show as small marks on the timeline ruler. The video gets a little longer: here it went from 5:52 to 5:54.
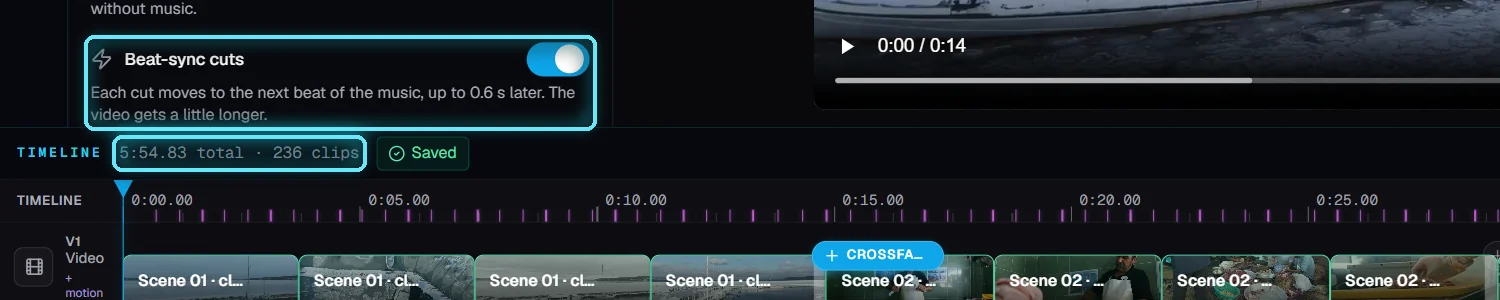
Beat-sync on: the ruler shows the beats, and the timeline is 2 seconds longer.
It needs a music track with a clear beat. On a quiet stretch with no beat, a cut stays where it was.
5. Add sound effects to your library
Click the SFX icon (the speaker). Sound effects work like music: click Open folder, copy your .mp3, .wav, .m4a or .ogg files in, one subfolder per group (like whooshes or hits), then click Rescan.
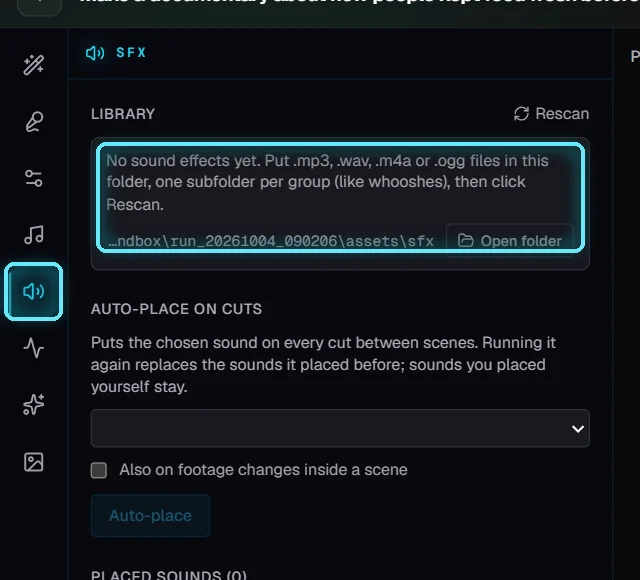
The empty sound effects library and its folder.
Each subfolder becomes a group in the library. The play button plays a sound, and + places it on the timeline.
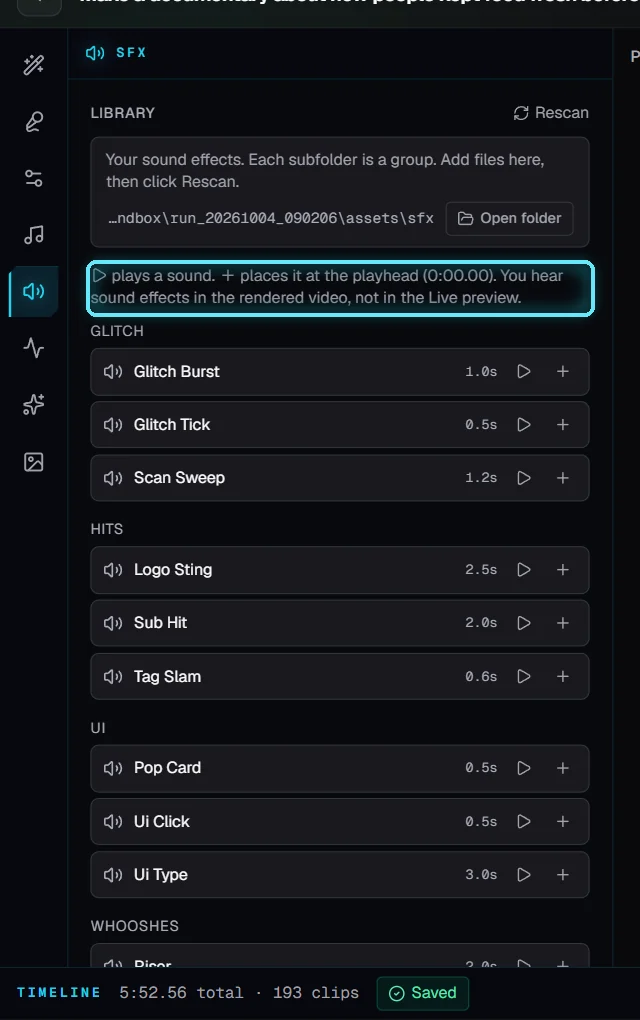
The library after Rescan, in four groups.
6. Place a sound at the playhead
Click the timeline ruler where the sound should play, to move the playhead there.
Click + next to the sound.
The sound appears on the A3 SFX lane at the playhead. Here a Sub Hit lands at 0:06, on the opening shot of the frozen harbour.
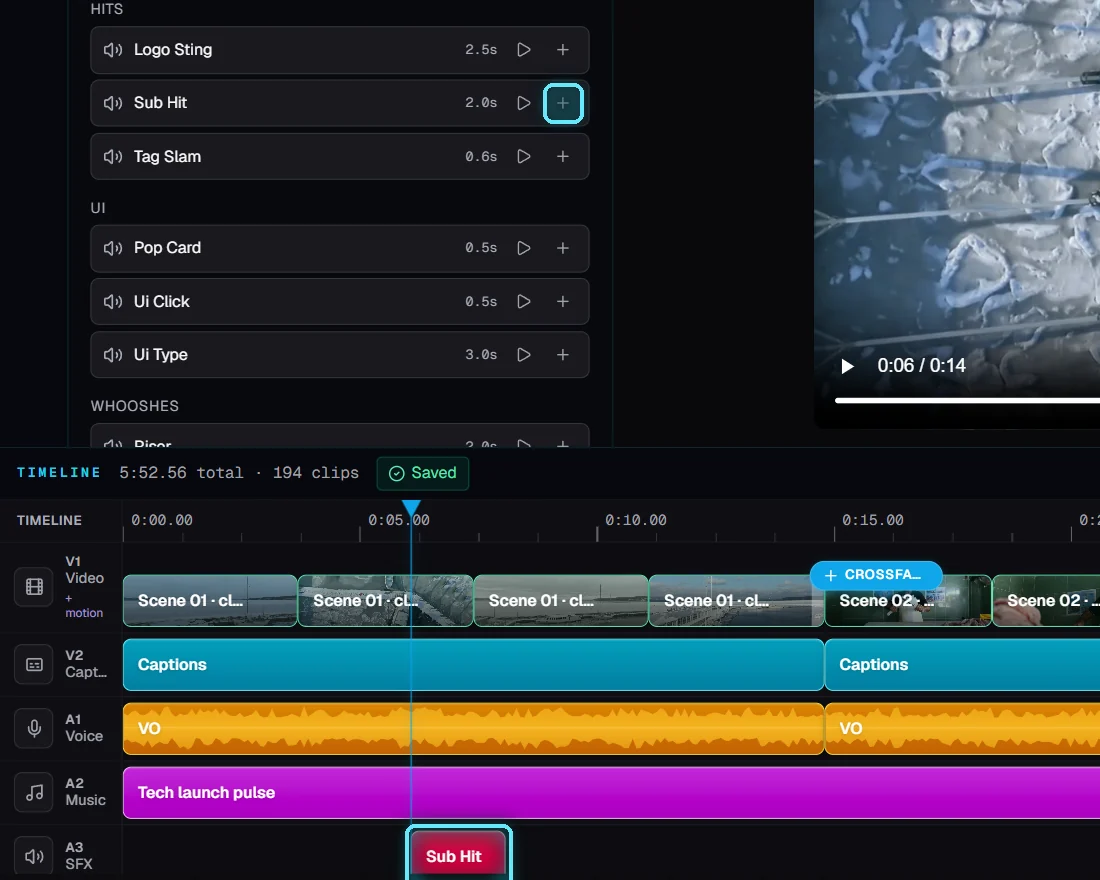
Sub Hit placed at the playhead.
7. Auto-place on cuts
Auto-place puts one sound on every cut between scenes. Pick the sound (a short whoosh works well), leave Also on footage changes inside a scene off unless you want a lot of sounds, and click Auto-place.
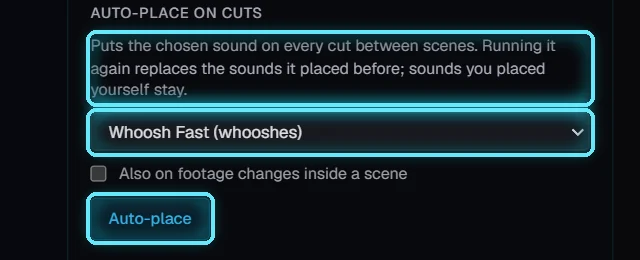
Auto-place with Whoosh Fast.
The list under Placed sounds shows every sound with its time. Sounds you placed are marked Yours; sounds from Auto-place are marked Auto. Running Auto-place again replaces only the Auto ones. The bin icon removes a sound.
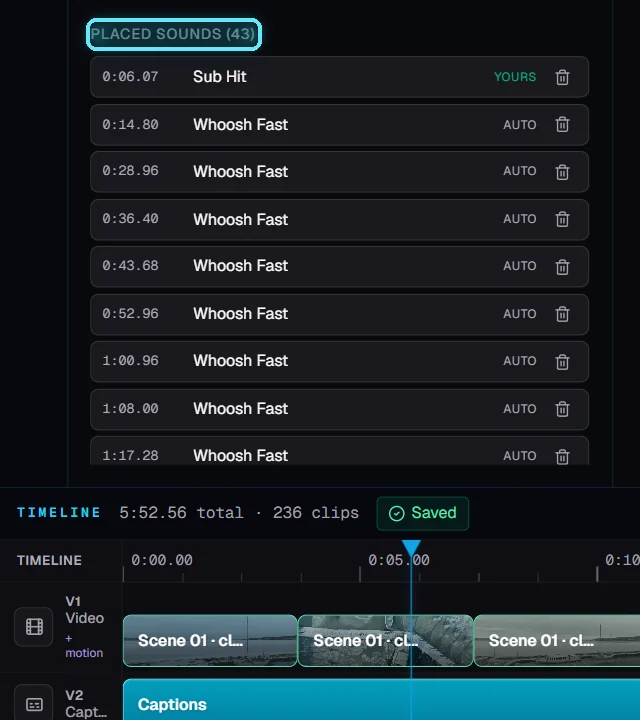
43 sounds: your Sub Hit and 42 whooshes, one per cut.

The sounds on the A3 SFX lane, one on each cut.
If the cuts move later (you switch Beat-sync on, trim a scene or change a narration line), the Auto sounds move with them. Sounds you placed yourself stay where you put them.
8. Render and listen
Click Render. It reuses the voice, footage and graphics, so it costs nothing; this 6-minute video took about a minute and a half on our PC. When it's done, the player switches to Final: play it to hear the music under the narration and the sounds on the cuts.
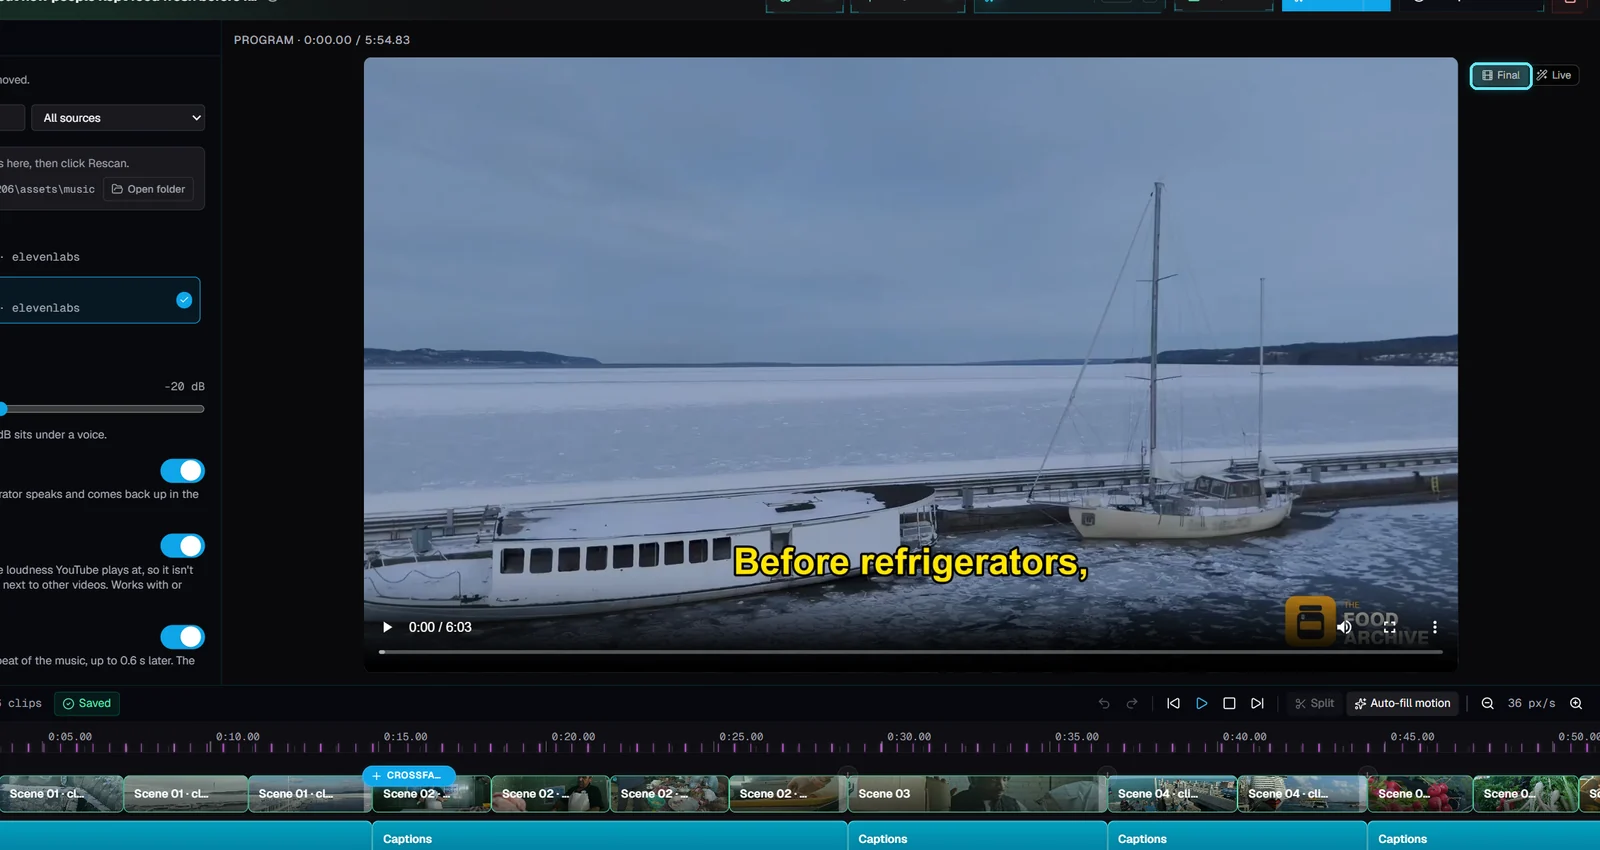
The finished render in the Final player.
Tips
Start quiet. Music that feels right while editing is often too loud on a phone. Try -20 dB with auto-duck on.
Fewer sounds land harder. A whoosh on every cut suits a fast list video; a documentary often needs only a few hits on key lines.
Check the license. Only use music and sounds you may use in videos you publish, especially on a monetized channel.
Troubleshooting
I can't hear the music or the sounds. The Live preview plays the narration only. Render, then play the Final player.
Rescan found nothing. Check that the files are in the folder the tab shows (subfolders are fine) and are .mp3, .wav, .m4a, .aac, .flac, .ogg or .opus.
Beat-sync didn't change anything. It needs a track picked and Background music on. Tracks without a clear beat leave the cuts where they are.