
Render, Full rebuild and exports
Make the video file again after you edit, know what a rebuild costs, and take the video, its timeline and its subtitles out of VidNexus.
Everything you change in the editor is saved as you go, but the MP4 is only made when you ask for it. There are two ways to make it: Render puts the video together from what is already made, and Full rebuild runs every step again. Then the Export menu gives you the video, a timeline for DaVinci Resolve, and subtitles.
The examples use the Ice King video from the earlier tutorials, with the cinematic shot from tutorial 25 on scene 3.
1. Render
Click Render at the top right of the editor. VidNexus puts every scene together with its transitions, music, captions, motion graphics and brand kit, and makes a new MP4. It doesn't make a new voiceover or look for new footage, so it costs nothing.
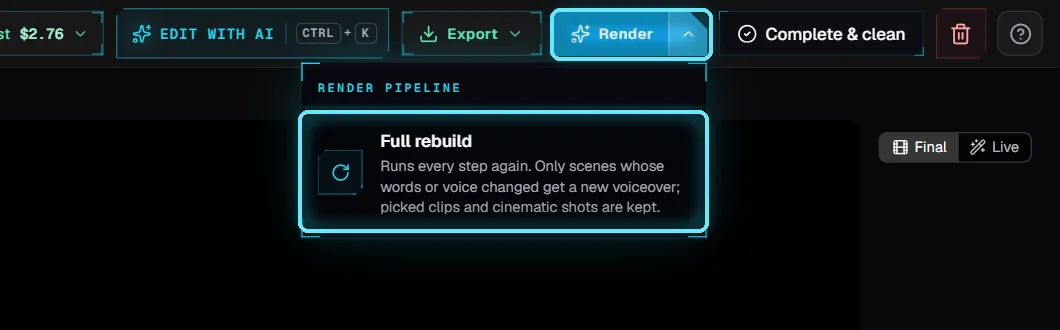
Render, and the arrow next to it for Full rebuild.
While it works, the button shows the step it is on. Point at it to see what that step does, or open the build progress page for every step. Stop build stops it after the current step.
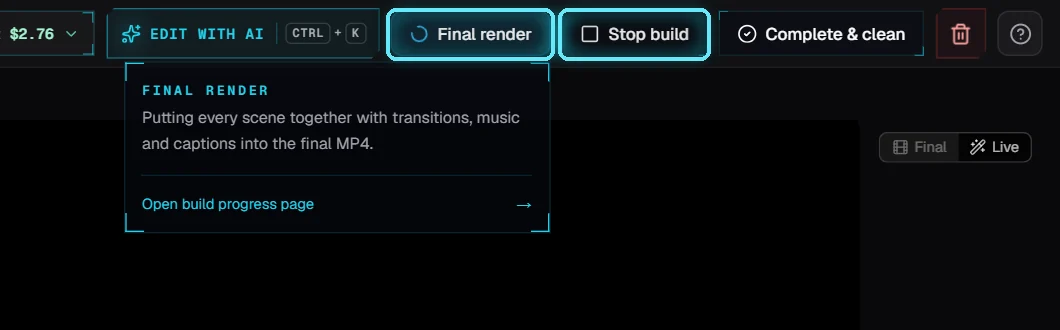
Rendering: the step, Stop build, and a link to the progress page.
Our 1:46 video rendered in 14 seconds on a Bosgame mini PC: the scene clips were already made, so only the final assembly ran. A video whose scenes all changed takes longer.
When it's done, the player switches to Final and plays the new MP4.
2. Full rebuild
Click the arrow next to Render, then Full rebuild. It runs every step again: voiceover, captions, motion graphics, footage and the final render. It is careful with what you already have:
Voiceover: a scene keeps its voiceover when its words and voice are the same. Only changed scenes get a new one, and only those cost ElevenLabs credit. A video made from your own recorded voiceover keeps it.
Footage: a scene keeps the clips you picked and any cinematic shot you used. Only a scene with no footage gets a new search, and searches are free.
Motion graphics: the ones on the timeline are drawn again; the ones you deleted stay deleted.
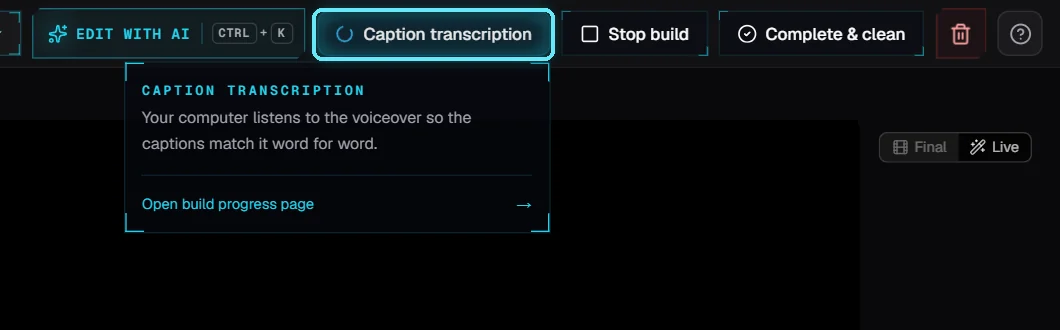
A Full rebuild on the caption step.
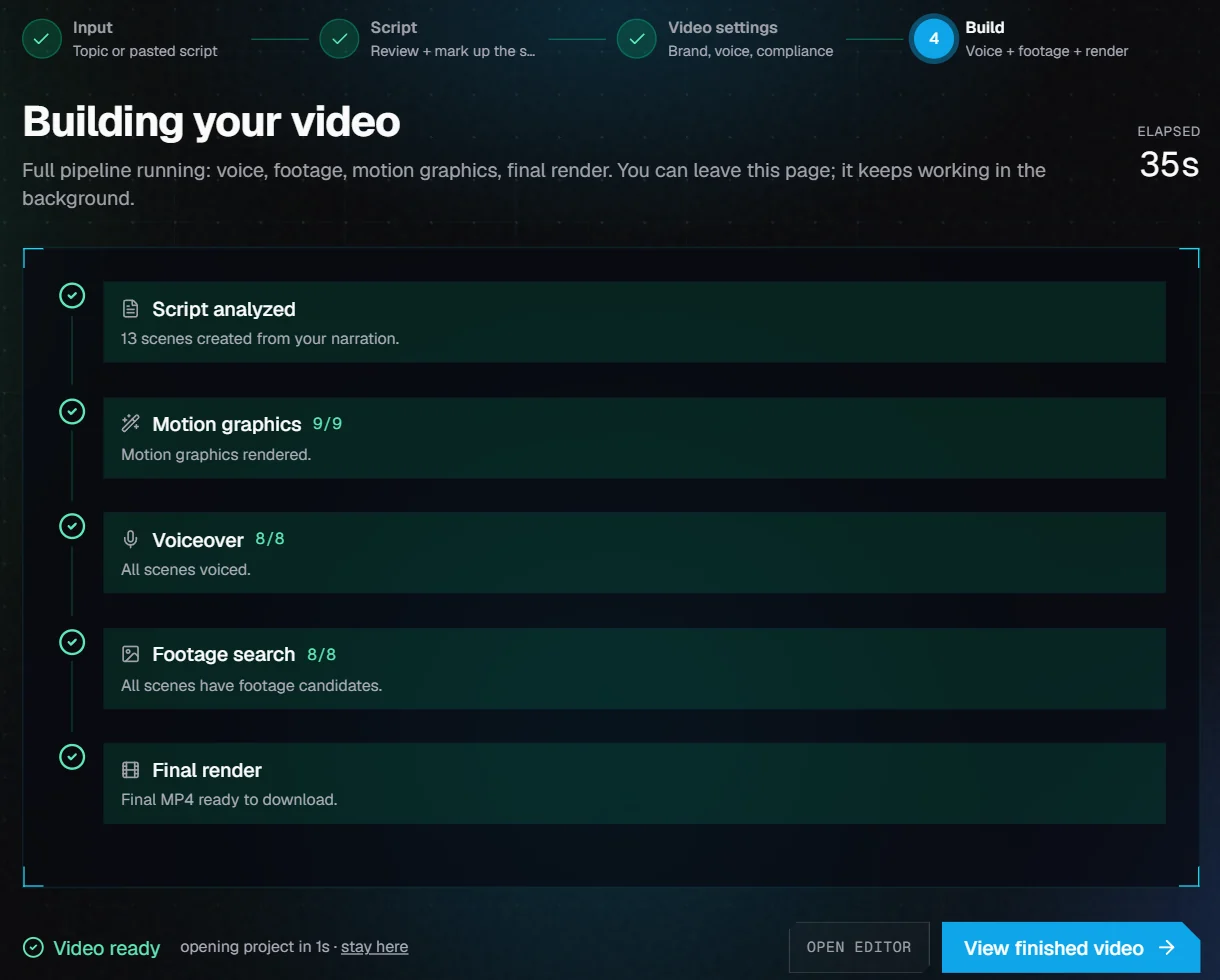
The build progress page: every step done, the video ready.
Our Full rebuild took 50 seconds and charged nothing: the project's costs were $2.76 before and after, and scene 3 still had its cinematic shot.
Which one to use
You changed... | Click | Costs |
|---|---|---|
Clips, trims, transitions, motion graphics, captions, music, the brand kit | Render | Nothing |
A scene's words or the voice | Regen voice on that scene, then Render (or Full rebuild) | ElevenLabs credit for the changed scenes only |
Several scenes, or you're not sure what's out of date | Full rebuild | ElevenLabs credit only for scenes whose words or voice changed |
A scene has no footage | Pick a clip in the editor, then Render (or Full rebuild to search again) | Nothing: stock searches are free |
3. Export
Once the video is rendered, click Export. The file downloads like any other: your browser or VidNexus asks where to save it, or puts it in your Downloads folder.
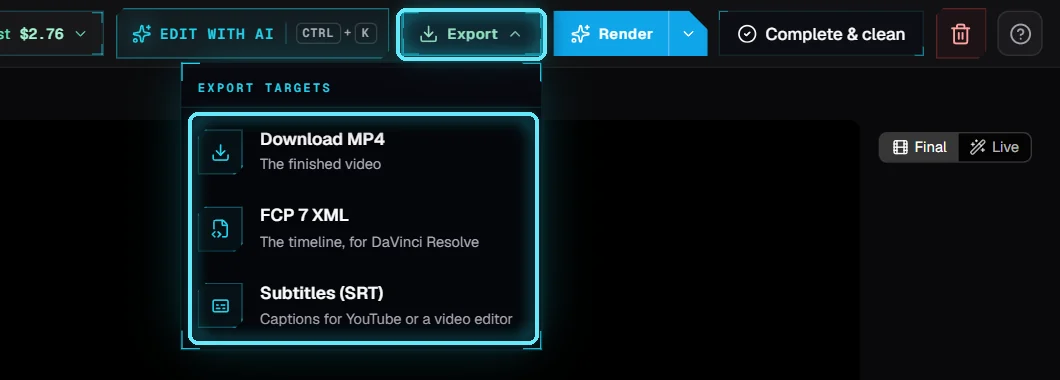
The Export menu: the MP4, the timeline and the subtitles.
Export | What you get |
|---|---|
Download MP4 | The finished video, exactly as you see it in the player (Final). Upload this to YouTube. |
FCP 7 XML | A timeline for DaVinci Resolve: footage on V1, motion graphics on V2, voiceover on A1 and music on A2, each scene in its place. It points to the files VidNexus made, so you can re-cut, re-time or grade the video in Resolve. |
Subtitles (SRT) | The words with their times, matched to the finished MP4 (the brand kit's intro and any crossfades included). Upload it to YouTube or import it into a video editor. |
The timeline in DaVinci Resolve
Click Export, then FCP 7 XML.
In DaVinci Resolve, open File, Import, Timeline, and pick the XML file. Resolve finds the clips where VidNexus keeps them.
If Resolve can't find a clip, right-click it and use Relink to point it to the VidNexus assets folder (Settings, Storage & Compute, Assets directory).
The XML carries the cut, not the finish: transitions, burned-in captions, the logo, the film look and the music levels aren't in it. Import the SRT for captions, and add the rest in Resolve. Do this before Complete & clean, which deletes the footage files the timeline points to.
Subtitles on YouTube
In YouTube Studio, open the video, then Subtitles, Add language, Upload file, With timing, and pick the SRT. The times match the MP4 you downloaded, including the intro and the crossfades.
When captions are on for the video, the SRT uses their word timings, a few words per line. When they are off, it has one line per sentence, timed by its length: good enough to read, but turn captions on (Video settings) and render again for exact timing.
A few lines of ours:
1 00:00:04,000 --> 00:00:06,360 In 1806, a young Boston merchant
2 00:00:06,360 --> 00:00:08,360 named Frederic Tudor had an idea
Next: Footage licensing: Compliance & sourcing.
Tips
Edit first, render once: Render after a batch of changes, not after each one.
Play the scene in Live mode while you edit; switch to Final when you want to see the rendered file.
Keep the MP4 and the SRT together: they belong to the same render. After another render, export both again.
Full rebuild is the fix when you don't know why a scene looks or sounds old. It only pays for what really changed.
Troubleshooting
"No voiceover yet for scenes 3, 5..." Click Regen voice on those scenes, or Full rebuild. If it fails again, check your ElevenLabs key and credit in Settings.
"No footage yet for scene 7..." Pick a clip for that scene in the editor, or Full rebuild to search again. Check your Pexels and Pixabay keys in Settings if nothing is found.
The Export button is missing. It appears once the video has rendered. Click Render first.
The build is stuck on one step. Click Stop build. If it hasn't stopped after a few seconds, Force stop appears: it frees the project right away.
Resolve shows clips as offline. The footage was moved or cleaned up. Relink to the VidNexus assets folder, or Full rebuild and export the XML again.